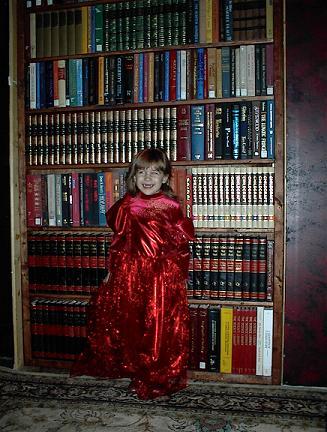
This is an idea I got from the Jekyll & Hyde Club in New York. To get into the rest room a patron had to push on a bookshelf that was actually a door. As soon as I saw it, I knew I had to have one of these doors in my haunt.
The first thing I needed was dozens, if not, hundreds of hard covered books. That would have cost me a fortune even if I managed to buy all the books at yard sales. So, instead, I went to the library. No, I didn’t check out a bunch of books, never to return them. Libraries discard surplus books all the time, especially reference material. The good folks at the Millicent Library in Fairhaven, MA were all to happy to help me out.
So, other than books, you will need plywood, 2x3s, strapping, screws, stain, wood glue, heavy duty hinges and the appropriate tools.
I built this shelf/door in my garage haunt, so I had the luxury of making it as large as I wanted, plus I wasn’t concerned with destroying the doorway. I won’t provide height and width dimensions here because I want to keep the directions simple and you may require a different sized door. So take your measurements and draw up a basic plan.
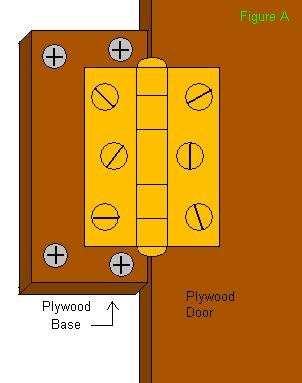
The plywood should be cut and attached to the back side of the doorway first. This will insure that the door functions properly before gluing in all those books. Cut the plywood slightly larger than the doorway. This will allow the door to be pushed and not pulled, plus it will help to keep light from shining through the sides of the door. Cut a couple pieces of plywood (or one long strip) as a base to mount the hinges to the doorway. When you hang the door, place shims on the floor underneath the plywood so that the door doesn’t scrape the floor when it is opened later. Mount your plywood base(s) for the hinges (See Figure A). The side that you mount your hinges on (right or left) will depend on which way you want your door to swing open of course. Be sure to pre-drill the screw holes so the plywood doesn’t split or weaken. Next, screw hinges to the plywood base(s), keeping them as level as possible so that the door will open and close smoothly. Now attach the plywood door.
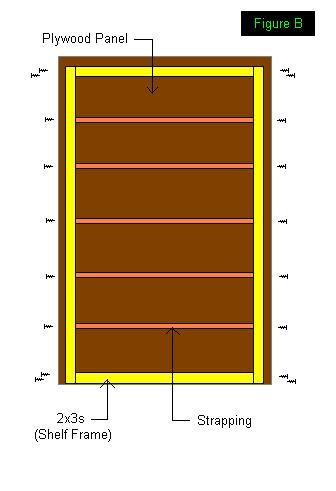
The shelf frame is next (See Figure B). Measure the height of the doorway and cut two 2x3s to that size. Remember to make the length of the 2x3s a little shorter than the actual measurement so that the door will swing freely. Screw the 2x3s in place from the back side of the plywood. Clamps help a lot here. Make sure the door opens and closes easily. Make adjustments now before it turns into a big problem later. For the top and bottom of the frame, measure the inside width between the 2x3s you’ve already attached. Cut two lengths of 2x3s to fit snugly. Again, screw these 2×3’s in from the back side of the plywood, but attach screws from the side as well as in Figure B. Make one last check to make sure the door swings unhindered. Add some weight to make sure it doesn’t scrape the floor once a load is added.
Next, cut the shelves (strapping) in the same manner that the horizontal 2x3s were cut, but do not attach them yet.
The height of the shelves will depend on the size of your books, so the books need to be cut next. I set my table saw to 1 and 3/4″. I wanted the books to sit close to the edge of the shelf and my strapping measured 1 and 7/8″. I used an old combination blade because the books have no grain and I wasn’t sure how much damage would be done to the blade. Turns out the blade was fine after all the books were cut. Remember that the binder goes against the rip fence. Wear a mask and goggles, because the paper dust is intense.
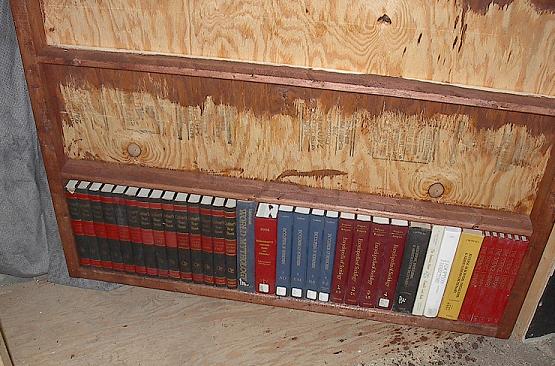
Arrange the books from largest to smallest by height. We want the same sized books on a shelf to conceal the fact that they are cut. Start with the largest books and fill the bottom shelf (which is actually the bottom part of the shelf frame). Make sure there are enough books on the shelf to fit snuggly, but not too tight. If the books are jammed in there you’ll have a hard time gluing them in later. Once you’ve got the books in, add your first shelf above the row of books. Leave only a 1/4″ – 3/4″ of space above the first row of books. Screw the shelf in from the sides and the back. It may be a good idea to use a level for this. Once that’s done, remove the books and set them aside. Grab the next set of books and repeat. You may find that the space between the top shelf and the top of the shelf frame is too small to stand your books. In this case, just lay the books on their sides. The important thing here is that we fill the space so that the illusion of depth is not ruined by the plywood showing behind the cut books.
When all the shelves are in and all of the books are removed, stain or paint your door. It isn’t necessary to stain the entire door, just the parts that the books won’t hide.
Once your stain is dry, start gluing in the books. I started from bottom left to right, putting wood glue on the back cover of a book and the edge that had been cut. I would do a row and let it dry. Make sure the books are held tight while the glue dries. You don’t want books falling off the shelves on the big night.

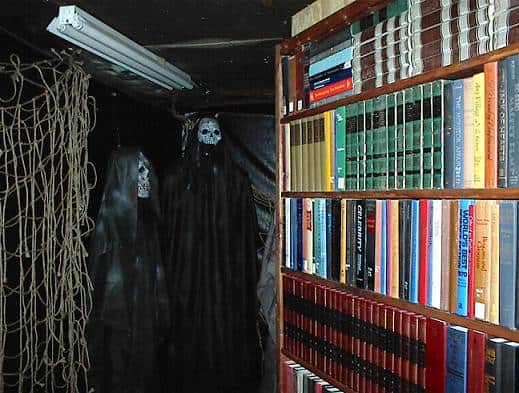
The bookshelf secret door is now complete. If you attach some sort of latch, keep it hidden and make sure it releases when the shelf is pushed on. I didn’t use a latch. Instead, I used a pulley system with counter weight to keep the door closed. When someone pushed on the door, ghoul props in the next room rose from the floor, then acted as my counterweight to close the door. Your best bet is to have an actor open and close the door. In any case and actor should be present for safety purposes. A patron won’t know to push on the shelf to leave the room and in an emergency that could be disastrous.