
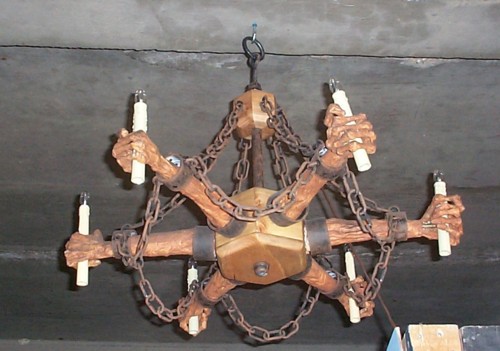
I think those giant chandeliers that you see at the big-time haunts are so cool. You know the ones that I am talking about. You are standing in line and look above you to see a huge chandelier made of thundered of bones. I have always wanted to make one. But then I get home and start adding up the cost of all those bones and the next thing you know I’m mumbling three words that every home haunter hates to say…”Maybe next year”.
With that in mind here’s a cheaper corpse arm chandelier you can made this year!
Warning: This prop uses 120 volts and should be built only by adults!
Making the base
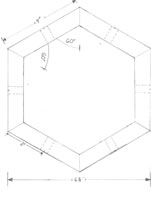
Here is s diagram of the base. Click on the picture for a better view. The sides are 4 inches on the out is with a 60 deg angle.

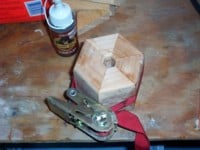
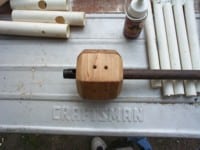
The base of the chandelier is just a simple 6-sided box. The sides are 1X6 and are cut at a 60-degree angle on the sides.

Here you can see that I marked the center of each piece. This is were the hole is drilled that will hold the light rod.

Then the sides are glued together. Here you can see the strap clamp that was used.
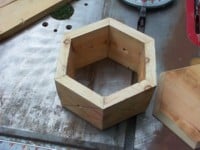
Once the glue is dry.

To make the bottom the base is placed on a piece of wood and the shape of the base is traced on the board. Then the bottom is cut out. I set my saw to a 30-degree angle to give the bottom a beveled look.
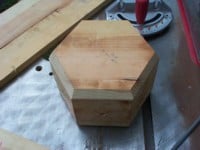
With the bottom piece cut you then glue that to the bottom of the base. Now a hole is drilled to accept the support rod.
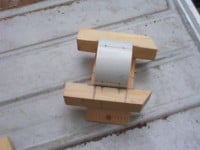
Next, a 2X4 is cut to make the top chain support. It is glued together and a hole is drilled through it for the support rod.

On this piece, there will be a chain link on each side. Holes need to be drilled to accommodate the links. I made a guild by measuring a link to help position the holes
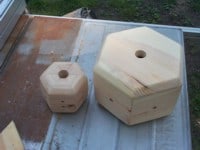
Sand the two pieces that you just made with a finishing sander. Then give it a good coat of stain.

Now its time to install the light rods. I bought 18″ rod kits at the hardware store. Also in this picture, you can see the lines that I used to find the center to drill in the bottom for the support rod.
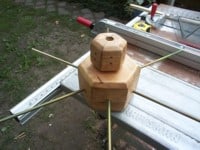
Now with the pieces finished and the rods installed it’s time to install the center support rod.
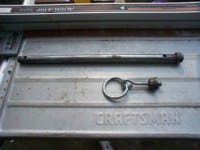
The support rod is made from a piece of 1/2 in iron pipe. Two holes are drilled into it for the electric wire to go into when the light is wired. Two pipe caps are also used. One cap I drilled a hole through it for the support ring. The total for the hardware was under $10.
The top wood piece is now glued to the support rod. Make sure not to glue it over the hole for the wiring.
The bottom wood piece is slide onto the the pipe and the bottom pipe cap is installed. The wood will be supported by this cap. In the picture to the left you can see that PVC pipe go over the light rods. At first I was going to make the candles out of PVC also but then decided to go with Xmas candles that I got from Walmart for $2 each.
Making the Arms

PVC was cut to length for the arms.
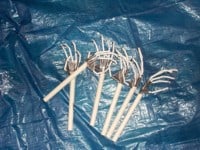
I had to make six Bic pen hands and arms for this project. This project uses the same idea as the Wall Sconces that I made last year.

Here the arms are almost finished.

I used Nutmeg Craft paint from Walmart to paint the arms. This paint is also used to give the hardware an aged look.
Next, the shackles were made from PVC connectors. I needed to make holes for 3 links. I made this simple jig to line up the holes.
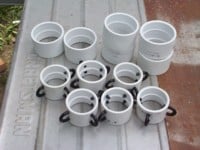
This project uses 12 connectors 6 are 2 1/2 inch and 6 are 2 inch. Only the 2-inch have holes drilled into them. Links are then cut in half and glued into the holes. The larger connectors will serve to hide where the arms meet the base.
The connectors are then sprayed with flat black and allowed to dry.
I used more Nutmeg craft paint to give the shackles an aged look. A small amount of paint was dabbed onto a sponge and then the sponge was lightly dabbed over the shackles. This technique gave a very really rusty look.

A wood screw was used to hold the shackle in place.

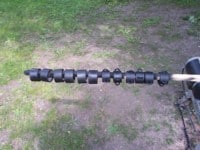
Now it’s time to add the chain. It took about 20 feet for this project. I cut a link in half and then inserted it into the top wood block. The length of the chain was then measured by letting it drape down to the shackle on the arm. A link was slit on one side and the extra chain was removed. The slit link was then pulled open and the link fastened to the shackle.
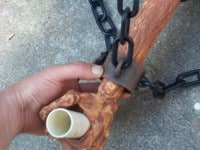
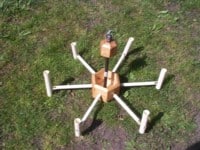
Here you can see the link connected to the shackle. Do all six arms and then start on the chain connecting shackles to each other. I just connected the first allowing it to drape a bit and then cut the other five to the same length

Here you can see how the chain should look at this point. The large 3-in connectors can also be glued to the base at this point.
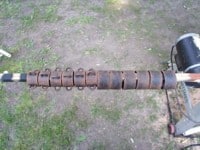
It looks good at this p[point but we need to make the chain look as old as the shackles. The same technique is used on the chain to age it as was used on the shackles. This part took me the most time to complete.

Here is a picture of the finished chain. I took this prop to a party after Halloween and no one could believe that it was not a real rusted chain. I misted over the prop with black spray paint to give it a dusty look. Don’t overdo it with the paint.
In this pic see that I started to use PVC as the candles. Later I decided to use Xmas candles from Walmart.

The candles were taken apart and a hole was cut in the plastic for the light rod. The plug was cut off and the wire threaded through the hole.
Here is a better shot of the hole.
Once the wire was through the plastic candle. I thread it through the light rod in the arm.

The hand then was bent around the candle so that it would seem that the hand was holding it.
Here you can see the inside of the base. The wire from the candles have to be split and connected together. It’s a good idea to tie a knot in the cord so that it can’t get pulled out. An extension cord was then cut and the end threaded through the top hole and then out through the bottom hole in the support pipe. All the wires will connect to this cord.

Most cords have a printed side or a side with a raised ridge. I connected all the printed wires together and then all the plain wires together. Wire nits were used to connect all the wires.
To really set it off I used flicker bulbs in the candles.
There you have it. A cheap chandelier that you can make for a fraction of the price of a bucky bones one. The most expensive part was the plastic chain. Ok, I still want to make one of those someday, but until then this one aint too shabby