

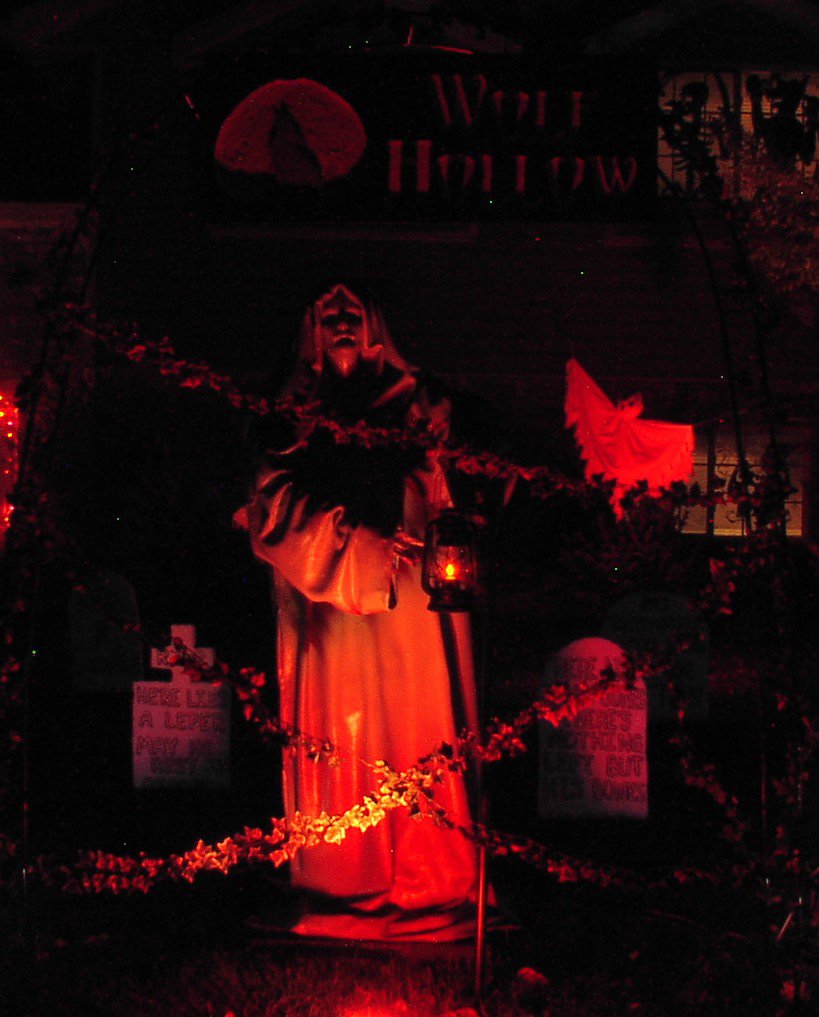
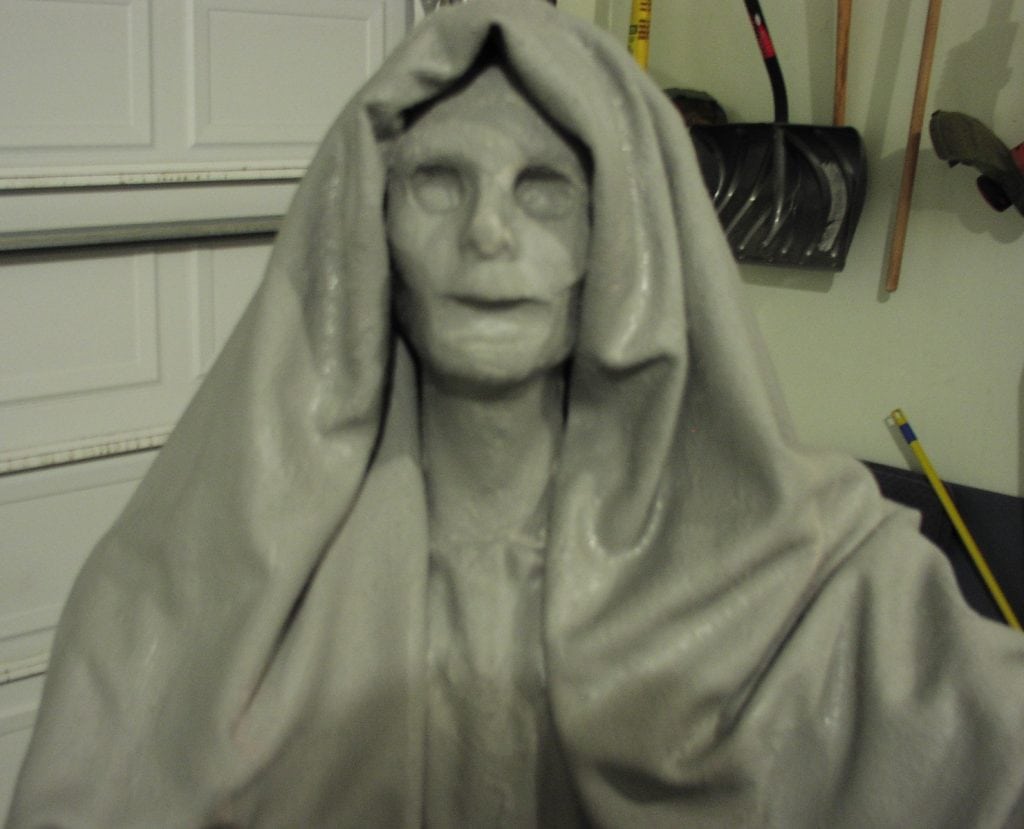
This is our first prop using Monster Mud. We were very happy with the results. He is 5 and a half feet tall.
He is holding an oil lamp we found at Wal-Mart that we hacked to hold an electric lamp socket that we borrowed from a plastic Jack-O-Lantern. We put a flicker bulb in it and ran an extension cord thought the figure. It looks really cool at night.
He stands under a garden arch at the “entrance” of our Cemetery. We shine a red light on him to give a really cool effect. We added some faux vine to block T.O.T.s from entering the Cemetery.
How To
Monster Mud is made by mixing 5 parts joint compound (the stuff used when putting up drywall) to 1 part latex paint. You can go to your favorite paint supplier and ask for for “oops” paint. This is paint that has been tinted wrong. We lucked out and found a gallon of exterior paint that was a nice gray color. You can paint over the Monster Mud with other colors, but the gray looked just like a stone statue, so we left it. We bought a 5 gallon bucket of joint compound which was a LOT more than we needed. Fortunately, one of our friends liked our prop so well he wanted to build his own, so we split the mud.
Here are pictures that we took during construction:
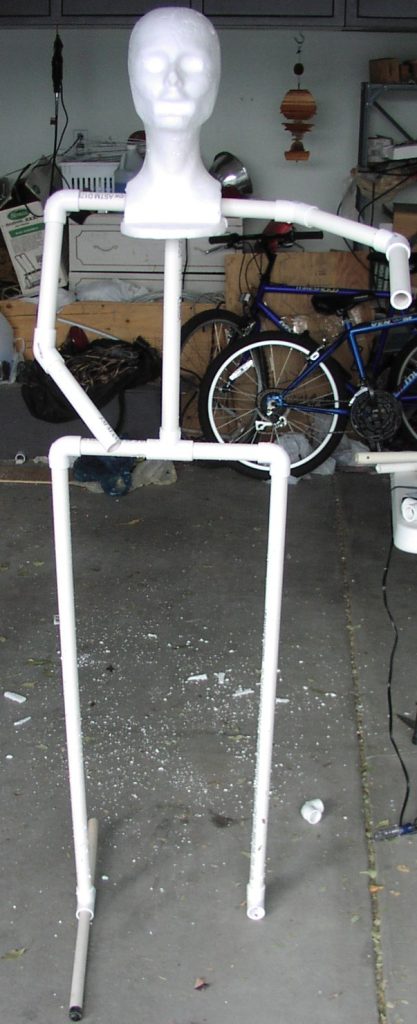
First we built a PVC frame. We used 3/4″ PVC, which we later discovered was a mistake. The 3/4″ was bending under the weight of the wet Monster Mud. Next time we will use either 1″ or use 2X4 lumber. We eventually added a square made of PVC at the base of the figure.
We posed the arms so he can hold the lantern.
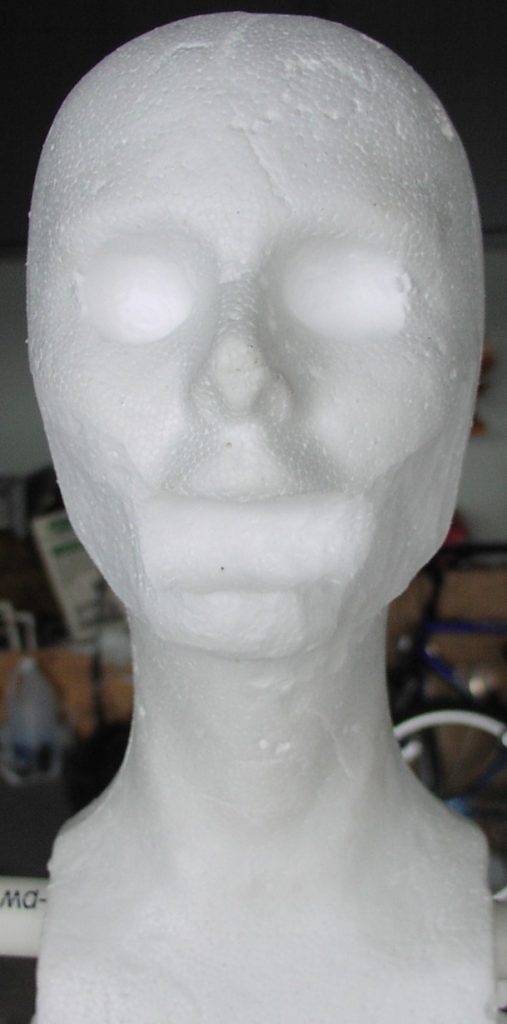
The head is just a Styrofoam wig head that we used a Dremel to shape the open mouth, hollow out the eyes, and hollow out the cheeks. we also cut out notches in the neck to fit around the PVC pipe used for the shoulders and the 4-way cross that forms the PVC neck the wig head is sitting on.

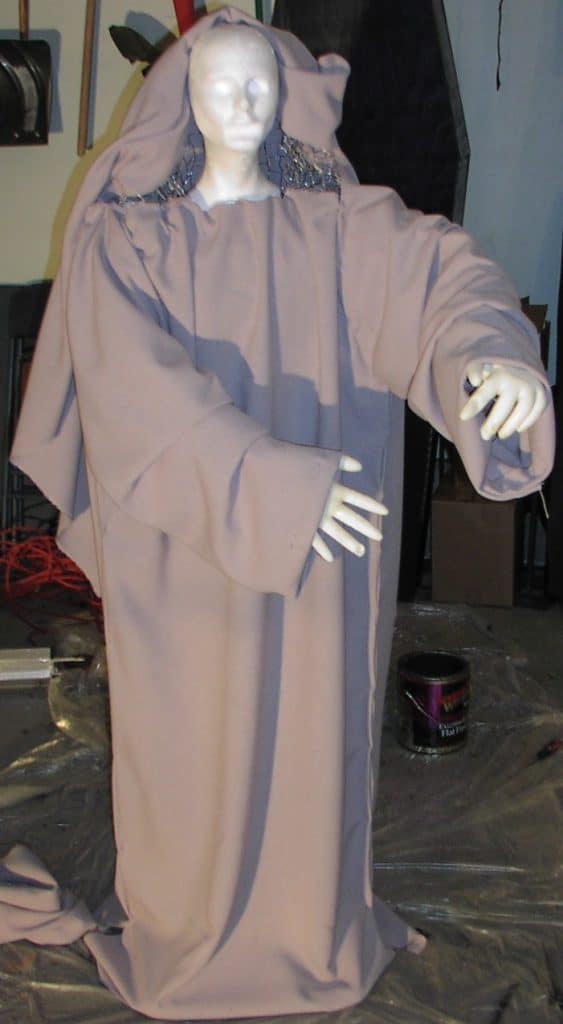
We then built a body of chicken wire. We also added a hood and flowing sleeves. We also added creases in the sleeves and the body of the robe. We used zip ties and wire to attach the chicken wire to the PVC Pipe.
Once the body was formed, we draped it with some cloth we found at Wal-Mart for $1 a yard (Muslin, maybe?). We cut separate pieces for the front and back of the robe. We also cut separate piece for each sleeve and the hood. We used safety pins to attach the material to the chicken wire. We then used straight pins to pin the material together.
We let the cloth flow as naturally as possible so we could get some natural looking creases.
The hands are latex gloves that we filled with Great Stuff spray foam insulation. We stuck a short piece of PVC pipe into the glove to act as a wrist. We found it worked best if the glove was not fasted down. When we used a zip tie to close the opening, the glove blew up like a balloon.
As it dried we bent the fingers and put a piece of wood on it to keep it in place as the Great Stuff dried. It ended up looking like a hand that is holding something. Make sure to get the foam all the way into the fingers, we had a couple of air bubbles that caused some problems after the hands dried.

Once the hands were dry, we took the left one and added a loop of stiff wire that will later hold the lantern. The handle of the lantern is fed through this loop to make it look like the lantern is being held.
Once the hands were attached to the PVC frame, we applied the Monster Mud by brushing it on. We decided to brush rather than dip because we thought the material would flow better.

As we applied the mud, the figure started to lean forward because of the weight. We propped the figure up while it dried, hoping the mud would harden up enough to help support the figure.
We ended up using two coats of mud. We found that the seams needed extra mud to make sure the coverage was good. As the mud dried, we created more defined creases. We decided to allow the fabric to spill on to the ground because we really like the effect.
After the mud was completely dry, we applied several coats of spar varnish to seal the mud. The varnish was very difficult to apply in all the creases. We are able to get good coverage from a small can of the varnish, which is good because it is quite expensive.
At this point we decided to add a plug-in lamp instead of a battery powered one (oops!). Fortunately my wife was able to crawl up inside and pull an extension cord down from the left shoulder…we really lucked out on that one.
We decide to build a base to keep the mud off of the ground. We built a box from a piece of plywood and 2x4s. We painted the base black.
We were very happy with the end result. We put it up in our yard and got comments from our neighbors immediately. Then the rain came…we quickly discovered that the rain could get into areas that was not completely sealed by the varnish. The figure softened up and started to lean forward…argh! We brought him back in until the weather improved.
We quickly built a staff using a length of PVC and two ninety-degree elbows. We added a screw through one of the elbows to attach the lantern. This stopped the leaning, and when the figure dried it actually hardened better, but now it leans to the right…oh well.
Lessons Learned:
- Use 1″ PVC or lumber for the frame
- Run wires before mud is applied.
- Seal completely
- Bring figure in when it rains.
- The audience will never notice the small flaws, don’t sweat the small stuff.
Even with all the problems, this is still one of our favorite props.