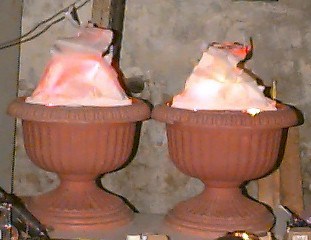
What is it burning there?
These are the urns that will be used with our mausoleum. Not too different from what folks are making, but you might appreciate a few observations I have made during construction.
These urns were a garage sale find, all of $3 for the pair. They are roughly 16″ around by the same tall, the interior is about 14″, so lots of room to work with. First things first, I found initially that the base and bowl were two separate parts. So I drilled through a small hole for the wires to pass through.


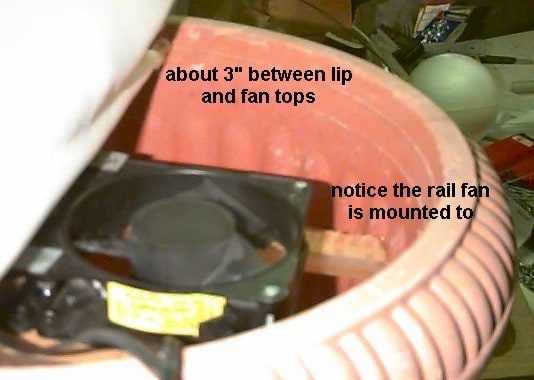
Next I cut support bars for the fans from acrylic I had laying around so the fans were about two inches from the bowl lip.
Originally I thought I could use 4.5″ muffin fans I had on hand but they were too low wattage, 6 watts to be accurate not enough flow. I found out when I test fired them. I then switched to a pair of 6″ fans, 40 watts, way too loud but it lofted the material. BTW I got material at Walmarts, its not Joann fabrics silk essence. It didn’t want to be taller than 8″. Now these 40 watters had too much power, and sucked the material under into the fan blades, very annoying to say the least.
Frustration was setting in. I added panels of luaun ply to the sides of the fans, and instead of having the material parallel to the fans I turned it perpendicular to them. This stopped the material from being sucked into the fans. One small problem with this setup. I didn’t have another matched pair of fans to use for the second urn, so off to the electronics surplus shop to get (4) 4.5″ fans with greater wattage than the first set and lower wattage then the second. Yippee I found what I needed.
NOTE: The plumbers strapping used to connect the two fans firmly and the fan cords for easy connection.
Now I could start over more or less. I experimented with the rail height until the fans rested about 3″ down in the bowls. At this height the material lofted well parallel to the fans if placed just below the lip of the bowl.
Lisa found a lighter weight cloth, so I switched to that, which allowed me to get a much taller flame, almost 14″. It looked much better, but it still wanted to go under the fans.
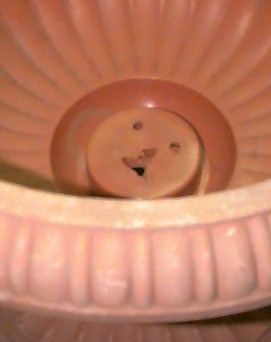

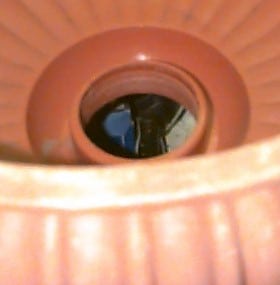
Looking at the inside of the urn, I noticed that the center connection between the bowl and base was about 2″ in diameter. Next I stripped the urn of the fans and material, so out came the hole saw. This allows flow from beneath the fans to prevent sucking the material into them. I mounted an outlet receptacle under the base by drilling some holes through the plastic base.


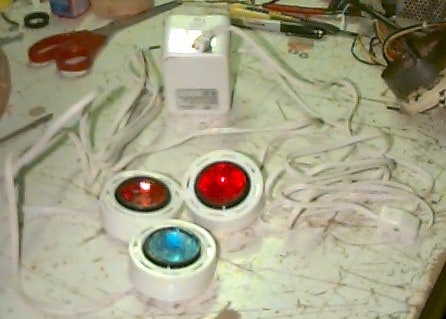
At this point, I should mention I got some halogen pucks like you mount under kitchen cabinets.

Hook up a pair of leads from the power cord to one set of contacts on the outlet, and the fan leads to the other. Then first mount one end of the outlet using 1.25″ machine screw & nut then plug the ballast into the outlet and mount through the screw tab on the ballast. Then through the outlet to the base with another screw & nut. BTW for those of you using fans with 2 prong connectors, I have cords that they plug into if you want to get some – email me
Next the wiring for the pucks is passed through the hole. At this point I fired up the fans to test the new fabric.
Once I was satisfied with the fans being level in the bowl I moved the fabric around in relation to the fans. The best position seems to be about 2 inches above the fans and perpendicular to the length of them. Since I was using 2 sheets of fabric, the best effect was with the dowels just offset into the air path from the midpoint, a 1/2″ in from center. This allowed airflow between the layers to enhance the rippling effect.
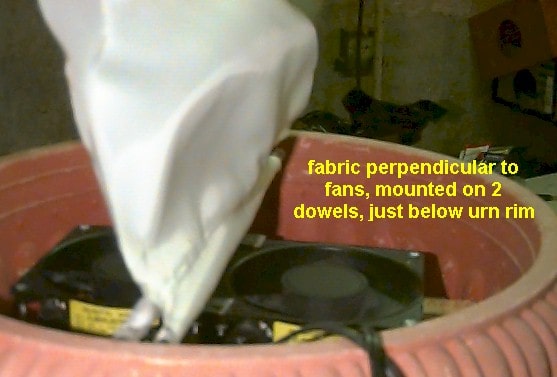

At this point the fans and fabric were hot glued into position. The fabric was also hot glued to form a sleeve to slide over the dowels, with any excess fabric trimmed to maximize airflow.
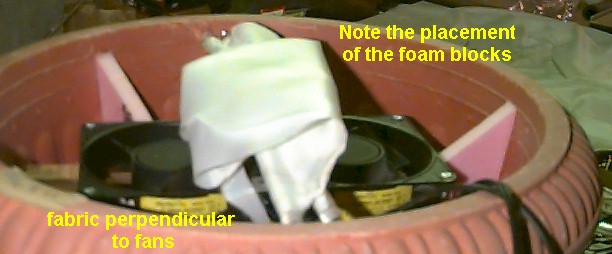
Next I placed foam blocks cut on the 45 degree angle with the upper edge 1/2″ below the bowl rim and hot glued those in place.
NOTE: Applying hot glue directly to foam melts it. If you apply it to the mating surface and allow it to cool a few seconds, the foam wont melt.
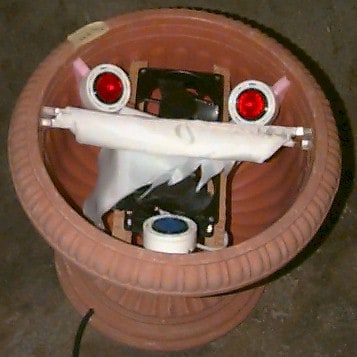
Next place the pucks on the foam blocks with the fans on and fiddle with the position of the lights until it illuminates the fabric
to your satisfaction.
NOTE: There is glass paint available at craft stores for$2 a bottle. The lenses on the pucks are glass, paint one lens blue the others red.
When you like the lighting hot glue the pucks in position
Now all that’s left to do is paint the urns. To paint them the workings need to be covered by taping some newspaper to the rim. Then base coat the urns in your primary color. Ours will be stone colored so we will use battleship gray. Then sponge on some white paint, and before the white dries sponge on black.
Next addition will be an improved fabric flame, and using LEDS on a 555 circuit (timer) to get a more natural flame appearance!