We lost the shelving unit we had been using for our witches kitchen. It had fallen over in storage and was broken beyond repair. (wasn’t in good shape to begin with) So we were going to need something to replace it.
I made these shelves to replace the broken one.

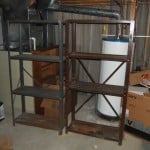
I picked up some old metal shelves from a lady who was throwing stuff out. These shelves desperately needed some help… they looked nothing like what I wanted.
I decided I would first cover them in cardboard. I am a cardboard pack-rat, so I had plenty to use. I fitted the shelves with it using masking tape to adhere each piece to the shelves.

Next I added cheap dollar store night-lites to the top of each shelf of each unit. As I had made a cardboard ‘lip’ on each shelf, these were completely covered from view. I am not electrician – and do not know enough about such things to trust tampering with cords, so I bought small dollar store extension cords and wired up all the lights, taping down the cords to the cardboard along the seams to hide them all.
Then I used a roll of black paper and basically wrapped the shelves in it. I used packing tape on one shelf unit, and then ran out. For the second shelf unit I used masking tape. It worked much better, as the paper had a bit of a waxy finish. I made sure to secure ALL seams with tape.
The shelves then got a light coat of flat black spray paint to cover the masking and packing tape – again the masking tape worked better here as it takes the spray paint easier, and shows less after painted.
I now had a set of black shelves….. really plain black shelves. I decided they needed to look like old wood.

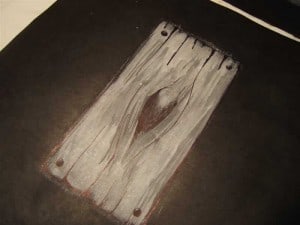
How to paint wood grain:
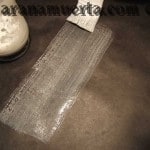
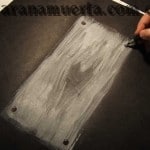
For this process I used a spoonful of white latex paint, and about 2 cups of water, mixed together. Then taking a 2″ paintbrush dipped into the watered down paint, I painted out the shape of my wood planks. Using the technique pictured below:


In some planks I added knots in the wood by twisting the paint brush in a circle over the still wet paint. Run paint brush along each side of knot lightly.


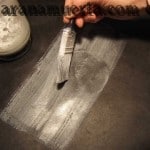
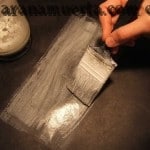
Next dip brush into the watered down paint, right to the bottom of the container where the paint has settled. Use shop rag to dab off excess water and paint. Starting at outer edges lightly brush inwards to create wood grain. Turn brush sideways to get more defined lines.
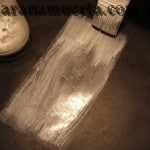
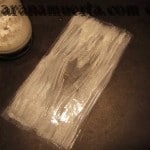
Let the paint dry.
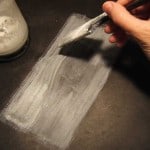
Using a sharpie or other black marker, outline and add some detail
this makes the board stand out.
Thats it. All done!