

This prop is a few years old already, but still gets many comments. I have had people willing to pay me to make one of these for them, but to be honest this took far too long to build to make even a small profit. The advantage of this prop is that it looks expensive, but isn’t. It’s just time consuming. I suppose this same thing could be created in a fraction of the time with a different medium, like clay, but this is a home haunt. Time I have (sort of), money I don’t.
I can’t say you can do this project without some sort of artistic ability. The instruction I provide here is more of an explanation of how I used the materials to create forms than how to sculpt anatomy. Because this is a gargoyle figure and not a human figure you can fudge some of the anatomy like I did.
I apologized for the lack of instructional pictures. When I started this project I really didn’t know how it would turn out because I was experimenting myself. Had I known it would come out OK I would have taken pictures throughout the building process. Most of the pictures have been taken after the project was done, so please bear with me.
The gargoyle is made mostly with paper mache. I really don’t have a measured formula for the paste that I make, so I’ll try my best to explain how I do make it. I use a small margarine bowl and fill it half-way with flour. Then I slowly add hot water, stirring the mixture with my finger until I get the consistency that I want. I don’t want it too thick to work with or too runny to use. What I look for is a consistency of batter. I add salt, lightly dusting the surface of the mixture. The purpose of the salt is to reduce mildew. Next, I add Elmer’s glue, thoroughly covering the surface area of the mixture in the bowl before mixing it in. The hot water seems to help make the mixture smooth.
I also like to use two different paper types when I paper mache. I will use brown craft paper for one layer, then heavy newspaper print for the next layer, alternating each time I do a layer. I try to do seven layers. This seems to be the rule of thumb to get a solid form. The form should be hard enough to knock on when it is done. Also, I rip strips of paper instead of cutting it for a smoother seems, then apply strips up and down for one layer and side to side for the next. Be sure to allow each layer to dry completely before applying the next.
I have no idea how much flour or glue that I used, having done this project slowly over the course of a few months, so I really can’t put amounts in the list of materials, but here is the basic list:
- Elmer’s glue
- Flour
- Salt
- Plaster
- 1 milk crate or box
- Junk clothes: Pants, long sleeve shirt, socks
- Duct Tape
- Newspaper and brown craft paper
- Aluminum foil * Foam pipe insulation
- Craft wire
- Floral foam

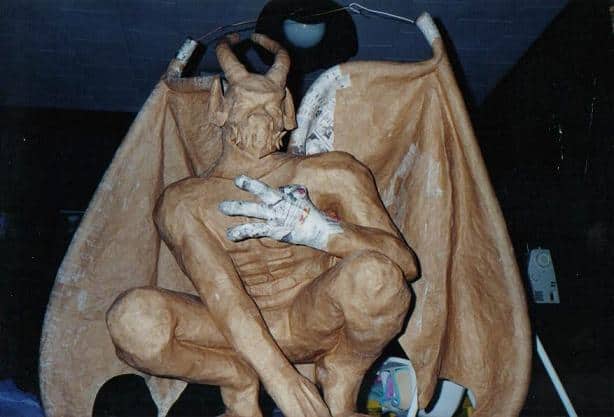
THE HEAD: I began the project with the head, then put it aside until the body was built. I made the head with a paper mache skull. Basically, wrap up a plastic skull with aluminum foil then cover it with paper mache and let it dry. Carefully cut the paper mache and foil from the plastic skull by scoring it around the middle and removing the two halves. Tape the two pieces of paper mache skull back together and add another layer of paper mache. A paper mache skull has spawned a number of my projects, so thanks go out to Spooky House Productions for the info.
The skull, however, is only the base for this head. I put round styrofoam balls in the eye sockets and built out the snout with duct tape and aluminum foil. You can use any appropriate sized spheres for the eyes, I just had the styrofoam balls on hand. Heh-heh. I said balls on hand. Heh.
I shaped craft wire into the basic ear shapes then paper mached over them and attached them with glue. I also built up the area of the brows to give it a more primitive look. The teeth are just small pieces of paper rolled into conical shapes.

To create the horns, I rolled up some newsprint in two identical tight cones. A layer of paper mache kept the cones in shape. I cut the cones in sections with angular cuts. When I put the pieces back together I put them in order, but turned them slightly to create different angles. So, instead of straight horns I got curved horns. I duct taped the horns to the the head and paper mached them. The more layers you put on here the smoother the horns will be.
For the neck I just used an empty duct tape roll and built up from that. With the head basically finished, I put it aside and started building from the ground up.
THE BASE: I needed a base to begin building on, so I used a milk crate. I just paper mached over that. You can use something else for the base, but this was easiest for me.
THE FEET: I created the feet, legs, torso and arms using a duct tape double. Wearing an old pair of socks I crouched into the same position that I wanted my gargoyle to be in and duct taped the socks on my feet. Once the socks are completely covered and supported by duct tape I carefully cut them off and re-taped the cut. I then taped them in position on the base I created earlier. I used crumpled paper and duct tape to create the forms of the long toes that seem to grip the edges of the base. I gave him three large toes on each foot, avoiding the headache of getting the anatomy right and giving him a fantastical look. Once the feet are in place, be sure to complete at least 5 layers of paper mache on the feet and base before moving on. I didn’t do this and the entire form collapsed one me later. It wasn’t easy to fix.
THE LEGS: Once the feet were completed I did the same type of thing for the legs. I wore a pair of old sweat pants, and crouched into position. I taped the sweatpants up completely and started cutting. This is when my wife decided to come home. She took some pictures of me struggling to get out of the duct taped pants, which I will not share here due to embarrassing partial nudity. It wasn’t pretty, but I managed to keep the form intact. I taped up the seems and lined up the form with the existing feet and went to work with the paper mache. You might notice that the hamstrings and the calves are paper mached together. This helps with supporting the weight and gives it more of a stone carved look. Also, I built up the legs with paper to make it look more muscular. Again, put enough paper mache layers on to support the weight of the parts still to follow.
THE TORSO: I used a flannel shirt to create the duct tape form for the torso in the same way I did the legs and feet. Because I was doing this on my own I figured I would do the arms later. I just cut off the sleeves of the shirt for later use. The torso was also built up with paper muscles once it was attached to the rest of the form. It is easier to add muscle now than wait until the arms are in place. I also put the head in place and secured it with tape and paper mache. Just make sure the neck is in proportion with the body.
THE ARMS AND HANDS: The arms were made in the same way the previous body parts were made. I used the left over sleeves from the flannel shirt. I did them one at a time and made sure they were positioned the way I wanted them before applying the duct tape. The hands were the tricky part. I carved the basic form of the hands from floral foam, y’know that green stuff that you stick fake-me-out flowers in. I carved the basic size and shape of the hands and then I pushed craft wire through each of the fingers the long way. This allowed me to cut the foam where the knuckles might be and adjust the position of the hand. Just make sure you don’t cut through the wire that you just inserted. I made each hand with three fingers and a thumb. Again, true anatomy is avoided and it adds a sort of reptilian look. I then taped the hands to the arms. I secured the arms to the shoulders with duct tape as well. One arm extended down to the base to add support. I glued each finger from his right hand onto the base then added support with paper mache. The arms also come in contact with the legs, so I paper mached them together where they touched. This also adds support. I added the muscular features once the arms were completely attached.
THE TAIL: At this point I thought is was a good idea to create the tail so that the form would have some extra support. All I did was roll up some newsprint to the desired width and taped it into position. I did this a few times, wrapping the sectional tail around the base, tapering the width as I got closer to the end of the tail.
THE WINGS: Here’s where the pipe insulation comes in. The pipe insulation I’m talking about looks kind of like pool noodles, only not as thick or bright. First, I unraveled some wire hangers and inserted them into the pipe insulation so the insulation tubes could be formed. To create the skeletal structure for the wings I cut two holes in the gargoyle’s upper back where I wanted the wings to attach. The holes were just big enough to insert the pipe insulation. I duct taped the tubes into place. I formed the curves that I wanted to create with them, then cut the insulation where I wanted the top of the wings to end, leaving the wire hanger intact. I then tied the remnants of the wire hangers together. I supported the wings from above by tying them with twine to an overhead support beam, pulling it tight enough to support the weight of the wings so the form would stay intact. Remember, when the paper mache on the wings is wet it will get a little heavy.
For the outside edge of the wing I just used more pipe insulation and wire hanger. I duct taped the outside of the wing to the top of the wing and cut it to the length that I liked.
The smaller skeletal structure in the middle of the wing was formed with pipe insulation as well, but this time I cut the insulation into quarters the long way. I secured two of those strips to the inside top of the wing and cut them to length (think of the skeletal structure of bat wings). I cut a large piece of the brown craft paper and taped it to a section of the wing, for example: between the outside of the wing and the first thinner piece of pipe insulation. Once it was taped in place I trimmed it into shape, removing the paper that overlapped another section and formed the bottom of the bat-like wing with scissors. You will notice I left some slack between sections so that it would look like the membrane of the wings is loose and the wings are capable of expanding. I then put a layer of paper mache over the wing section before moving to the next section. Putting paper mache over a dry piece of paper made the wing wrinkle a bit, but I thought it added to the stone effect. It looked a bit like the wings were roughed out of stone and left that way. Once all the sections were completed I added addition layers of paper mache.
Looking back, I should have attached the bottom outside of the wings to the base to add support, but I didn’t.
Once there were enough layers of paper mache applied to support the wings, I cut the twine and extra hanger wire off . With enough layers of paper mache I no longer needed the twine and wire to support the wings. I also added “horns” to the top of the wings. For this I used the same method I used for the horns on the head.
FINISH: Once everything was together I finished the paper mache layering, trying my best to smooth out any rough spots and seems. I added a layer of home made “Gesso”. This is a mixture of glue, plaster, water and a small amount of tung oil that I painted on with a brush. This helps to hide the paper mache seems by making the surface look smoother. Unfortunately I no longer have the recipe I used for the home made gesso. I originally found the recipe in a book I borrowed from the local library, but they no longer have the book. You can find different recipes on the internet. I’ve looked, but I haven’t found one without additional ingredients.
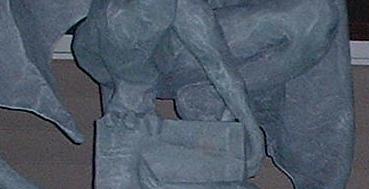
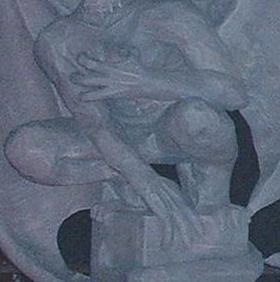
Next came painting. I used exterior latex paint for the first two coats. Although this should help protect the gargoyle from rain, I don’t think leaving it outside in the rain is a good idea. I selected a medium gray for this and let the first coat dry before I applied the second. Once the second coat was dry I added low-lights, using a can of dark gray acrylic spray paint. The spray paint was applied sparingly. I just wanted to break up the medium gray to help give it a stone like effect. I wanted flecks or dots of dark gray, not a complete coat. When that dried I added highlights using a light gray exterior latex. This was applied by putting just a little paint on a 1″ brush, then brushing a scrap piece of cardboard so that there was very little paint left on the brush itself. Then with quick motions I applied the paint to the gargoyle. This would leave paint only on the high spots of the form, thus creating highlights.
The gargoyle is now finished. I won’t go into detail how I made the stand, but I used two by fours and plywood and covered that with a 1/2 inch of styrofoam and painted that the same way I painted the gargoyle. There are a lot of web sites out there with instructions on creating grave stones and I used the same methods for the stand.
I admit that these aren’t the best of instructions, but if I ever do make another gargoyle I’ll be sure to take more pictures. Hopefully, you got something out of this. If you try this project and have any questions just drop me an email.
Good luck.