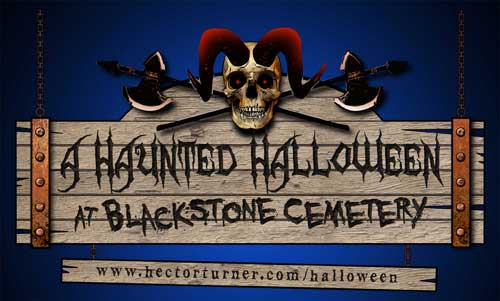
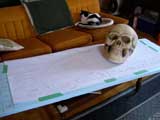
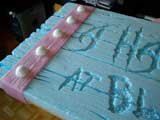
Here is the proposed design for the new haunt sign I’m building this year. The sign will be made out of 2″ foam (I was recently given a whack-load of it by a friend… sweet!) carved and painted to look like weathered wood with rusted steel strapping. To give you a sense of scale the skull isn’t just a Bucky – it’s one of those giant foam ones you get from Big Lots! I’ll add the horns with paper mache & Celuclay. I’m still working out the details but based on the size of the giant skull the sign will be about 6 feet wide x 2.5 feet high! . The axes are just cheap plastic props but I’ll paint & detail them to be more realistic.
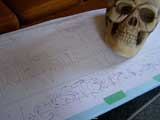
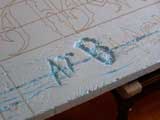
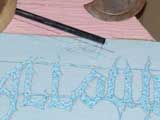
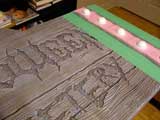
In the end I had to get a new piece of 2’x8’x2″ foam board as none of the scrap pieces were big enough. I printed out the design and taped all the sheets together to transfer the lettering to the board like I do for my tombstones. I then used my wood burning tool and traced the letters pressing fairly hard. It slightly melts the foam through the paper and makes enough of an indentation for me to see. One that’s done I started to carve out the letters into the foam, again using the wood burning tool. I experimented with how I’m going to create the wood grain so that it looks like old and weathered boards. I think once painted it will look ok.
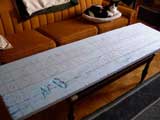
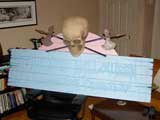
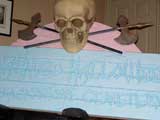
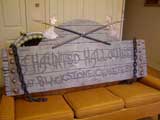
Here are some shots of the sign as it is just about ready for painting. It took me a bit longer to carve the lettering than I thought but it’s looking good now. I’ll do a bit more on the wood grain and then add the faux metal straps. I have to say that with the skull and axes temporarily in place the thing is huge! It just has such an imposing presence, even unpainted, I can’t wait to get it hung on the front of the house. It’s actually so big I found the foam was starting to crack just from moving it around so I had to add more wood bracing on the back than I first thought. I’ve also worked out a way for the skull to be removable for storage. It screws into the wood brace in the back.
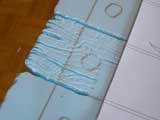
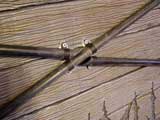
The metal straps were made with a roll of foam insulation strips and styrofoam balls cut in half for the bolts. I glued them down and also wrapped them around the back and stapled them in place using a staple gun.
I don’t have any pictures in-progress of the wood being painted as they didn’t turn out very good (colour was washed out with the flash and was too blurry without the flash) but what I did was paint the entire surface my standard flat dark grey. I made sure to get into all the nooks & crannies of the carved wood grain. This was by far the most tedious task of the project so far. I’d think I had everything covered and then I’d tip it up to look at it from a different angle and see all these spots of pink foam I had missed. Eventually it was all covered and then I went over it again with a flat dark brown. I didn’t go for total coverage but streaked and dabbed it with the grain to get a mottled look – I didn’t want an uniform colour but something more “splotchy” and natural looking. Once that was dry I dry-brushed the entire surface with a light grey to get that silvery-grey colour that old weathered wood has.
To paint the metal straps I first masked off the wood using low-tack painters tape and then painted the straps and bolts basic black. I used what I had on hand which was black Tremclad rust paint. I’ve used it for my fence and it gives good coverage and seems to stick well to most surfaces. Once dry I sponge painted two different shades of rust and again dry-brushed just a bit with light grey.

Next the axes were attached. One of the axes was cut where they crossed so that they both would lie flat – this will be covered by the skull and not seen. I used plastic clamps and glued them down I also positioned them so that I could screw them to the wood brace on the back as seen here.
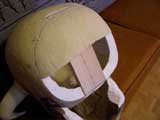
To attach the foam skull I first cut off the back so that it would sit flush against the surface of the sign. I then cut out a notch and glued in a piece of wood. Part of the skull could then be glued back on after it was trimmed to match the top arch of the sign. To mount the skull I used two long screws that go from the wood brace on the back, through the foam and into the wood brace in the skull. This way it is more than secure but can be removed for storage or to add LED eyes at some later point.
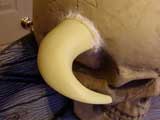
The horns were a last minute addition. I had planned for them as can be seen in my concept sketch but didn’t think I’d have the time to make paper-mache horns. I then came across a cheap plastic viking helmet in a costume store. Although the shape wasn’t exactly what I had in mind it would work. I filled the hollow plastic horns with expanding foam to give them some structural strength and have something more substantial to glue. Construction adhesive made it easy to glue them to the skull. Next year I might apply some paper-mache texture and colour to the horns but for now they’ll work as-is. The next step is to hang the sign from the front of the house
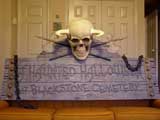
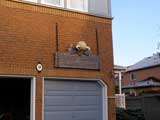
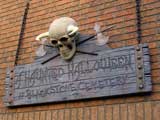
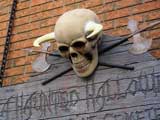
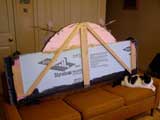
Here is the completed sign hung in place above the garage. I have to anchour the bottom against the house so it won’t swing or move around in a wind but because of the wood braces on the back the foam isn’t rubbing against the rough brick. Also because of the added wood it’s not heavy but not as light as just the foam would be so that also helps to keep it from blowing around. Next year I’ll keep working on the horns and maybe shorten the chain to allow for a hanging sign underneath. Maybe my website URL like in the sketch or a countdown to Halloween sign where I can change out the numbers.
(It should be noted that if you want to add something like horns to a skull, make sure to do it far enough in advance so the glue has a chance to set before hanging it up high on the front of the house. Especially if it’s raining out. Otherwise you might find yourself like me 10 feet up in the air on a ladder with a hot glue gun plugged into an extension cord trying to glue down horns that keep wanting to slide right off the side of the skull! I finally did get them secure and the next year painted the horns to match the skull covering up the copious quanities of hot glue. No one will ever know.)
I’ve already gotten some stares from the parents walking their kids to school! I’m pretty happy with how it all turned out. It should really add to the whole look of the haunt and build excitement leading up to the big day.