I`m going to try an explain how I my made my crank skeleton rib cage and arms. You can mount
any light weight skull on the body. The skeleton bodys I make are very light and can be used for
any prop.And once you make one you will see how easy it can be adapted to any other props (
pop-ups,hang man).
Supplies
- 16 gauge galvanized
- wire
- 12 gauge galvanized wire
- 1/4 plastic tubing
- 3/8 plastic tubing
- 1 gallon mask latex
- 2 bags of cotton balls
Tools
- Diagonal pliers
- Long nose pliers
- Drill and 1/8 bit
- Tape measure
- Safety glasses
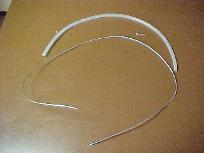

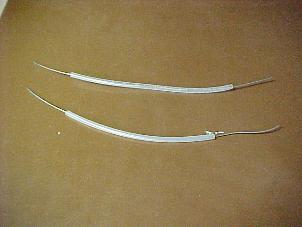
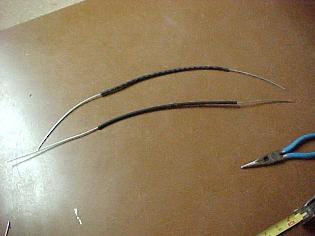
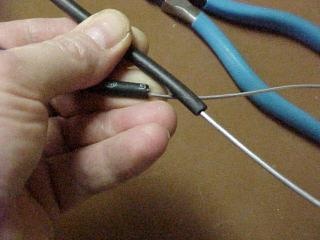
Making the back bone.The first thing I do is cut a 24″ long piece of 3/8″ tubing and a 46″ pieces of 12
gauge wire. Now insert the wire in the tubing leaving 8″ sticking out one end and 10″ out the other end.
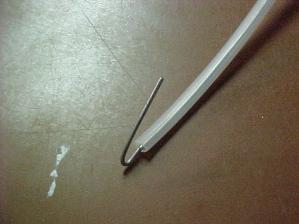
Bend the 8″ of wire back over the tubing as in the picture on the left.This end of the back bone is the
bottom
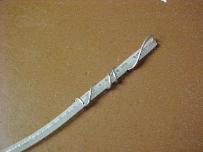

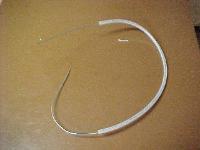
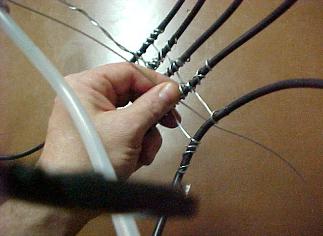
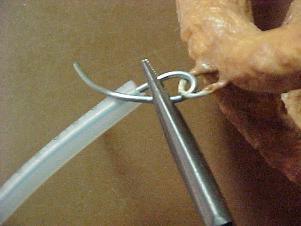
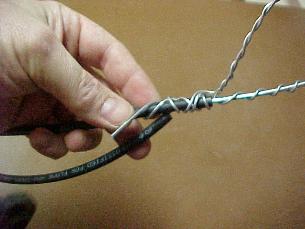
Now I wrapped the 8″ of wire around the tubing as in the picture on the right. The other end with 10″ of
wire sticking out is the top of the back bone.I made a loop by bending the wire back and twisting it
around.You can see this in the picture on the right. This loop is were you would mount the skull your
using.You can make this loop any size that works with you skull.

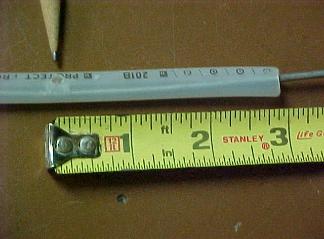
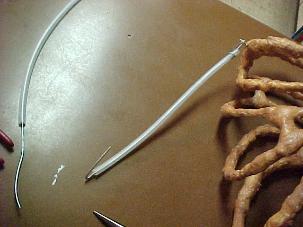
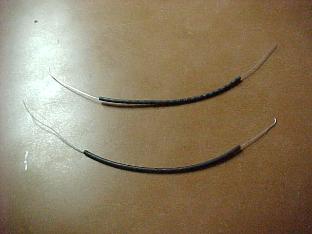
The picture on the left is what I have to this point. The top of the back bone has the wire with the loop at
the top.Now I measure 3″ down fron the top of the 3/8″ plastic tubing and drilled a 1/8″ hole. This hole is
were I will attach my first rib. Next I`ll be making 5 ribs. You can make as many as you want.I`m lazy.

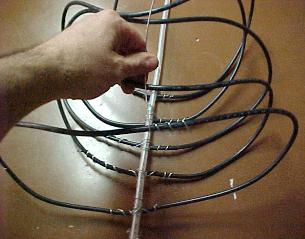
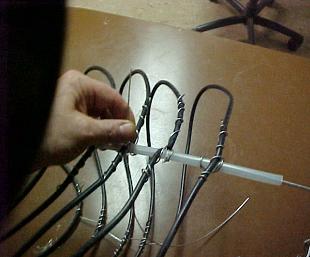
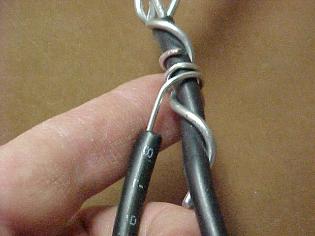
To make the first (top) rib I cut a 40″ pieces of 1/4″ plastic tube and a 48″ pieces of 16 gauge wire. Now insert the wire in the tubing leaving 4″ of wire sticking out of each end of the tubing. I will use the 4″ of wire at each end to connect the rib to the back bone. I put the 4″ of wire from one end thru the hole I drilled in the back bone as in the picture in the middle. Then I wrapped the wire around the back bone twice as in the picture on the right.

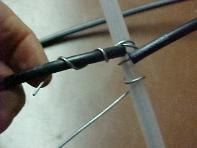
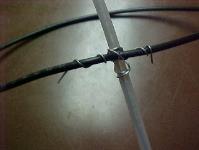
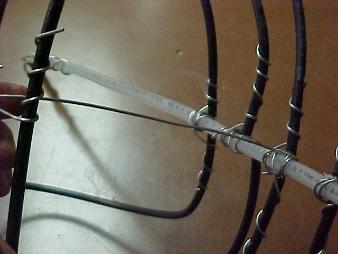
Next I took the other end of the rib and wrapped the 4″ of wire around the back bone. So now both ends
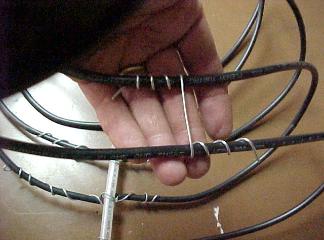
are connected to the back bone as in the picture on the left. Now as you can see in the middle picture I
now take the wire thats wrapped around the back bone and wrap it around the ribs. Take a minute an look
at the pictures. This will secure the rib to the back bone. Don`t worry if it feels loose because this just
building the basic shape later I will use more wire to make everything stronger
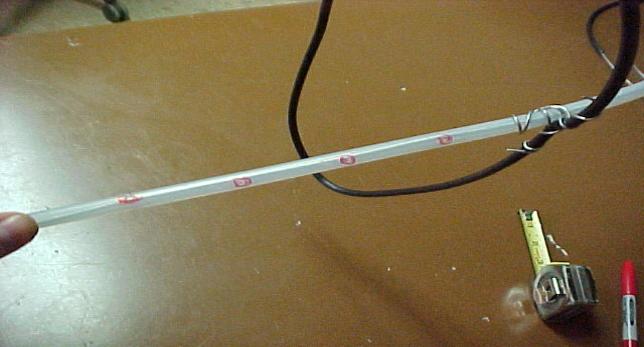
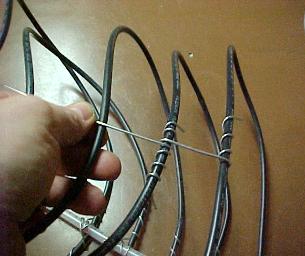
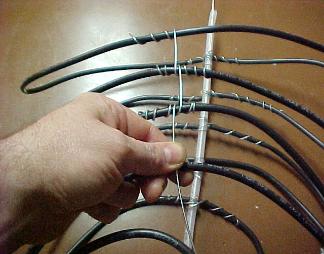
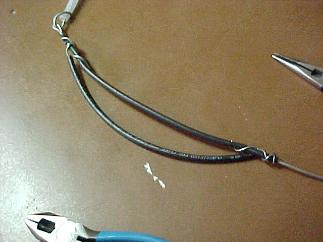
Now I go back to the back bone and drill the holes were I will be mounting the other ribs. In the picture
above you can see the first rib at the right. The red marks are the holes I drilled for the next four ribs. I
measured 2″ from the first rib and drilled the hole for the second rib.Then I measured 2″ from the second
hole to drill the hole for the three rib.I did the same for the fouth and fifth hole.
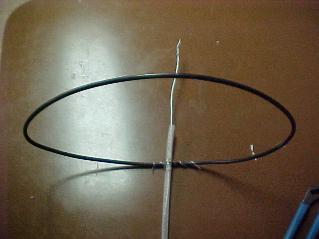
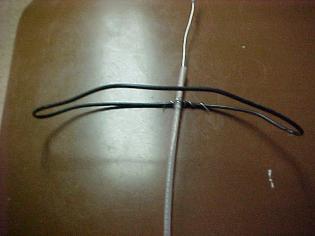
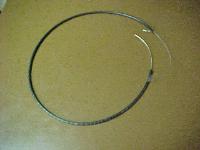
The picture on the left is were I`m at right now a circle .I just bend the circle in a little and I`ve my first
rib.I`ll go back later and add more wire to secure the ribs together better.I have to make 4 more ribs so I
will cut two 38″ pieces of plastic tubing and 2 pieces of 46″ wire for the next two ribs. Once I cut them I`ll
insert the wire in the tubing and attach the ribs to the back bone just like I did for the first rib. Then I will
cut two 40″ pieces of tubing and two 48″ pieces of wire.Then I insert the wire in the tubing and attach the
last two ribs just like I attached the first rib
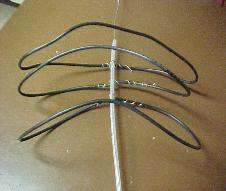

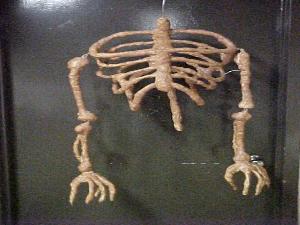
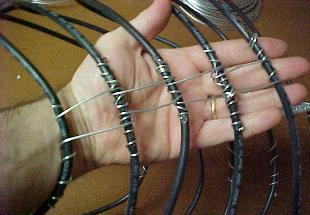
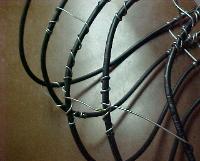
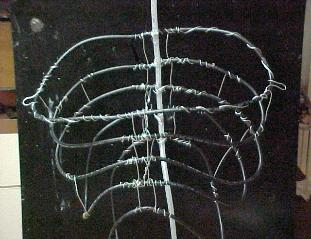
Here is some picture of the ribs attached.Once I shape each rib it will look like a rib cage.


Now I`m taking a minute to push all the sharp ends of wire into the tubing. This will keep your skin in tack
and make your prop safe. What I do is bend the wire so the sharp end is pointed into the tubing. Then
using your long nose pliers just push the wire thru the tubing. This also makes the frame stronger.
Now I going to connect the ribs in the front by building the breast bone. First I cut some pieces of 16 gauge
wire about 6″ long.Then I wrap half of the wire around the top rib. You can see this in the picture on the
left. Then I connect it to the next rib. If you look at the picture on the right you can see what I`m doing a
little better.If your having a problem following along just look thru the next few pictures.
In the picture on the left Im just repeating what I did between the first rib and the second rib but now its
the second and third ribs. On the right I`m doing the same thing to the third and fouth ribs. It`s not shown
but I did the same thing with the fouth and fifth rib.You can really see it in the picture below.
In the two pictures above I`m surpporting the rib cage by adding a wire between the back bone and the
breast bone. To do this I added the wire on the back bone at the third rib. The other end connected to the
second rib by the breast bone.

On the left you can see I completed the left side of the breast bone. The right shows the right side
completed. I`m not worried about how straight the wires look because they will be covered later.


Now I flipped to the back and did the same thing to build up the back bone.The first picture shows the
back bone before .The 2nd picture shows one side done then the last picture show both sides done.
In the two pictures above I`m surpporting the rib cage by adding a wire between the back bone and the
breast bone. To do this I added the wire on the back bone at the third rib. The other end connected to the
second rib by the breast bone.

Now I`m adding another support between the back bone and the breast bone. This one starts at the back
bone at the last rib ( the one at the bottom) and connects to the breast at the second rib.


Now I`m adding supports between the ribs.I just wrap a wire around one rib than wrap the other end
around the rib under it. Look at the picture below to see how I placed the rib supports.

I placed some supports on the back of the right side. You can also see the support on the left in the front
between the third and fouth ribs.Just have to add the wire loop for the arms at the shoulders and were
finished with the rib cage wire frame.
In the two pictures above I have added the loops that the arms connect to.I just wrap some wire around
the rib were I want to attach the arms to. Now on to the next step building bones.
Building bones
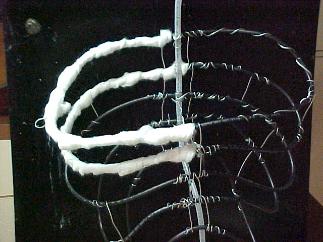
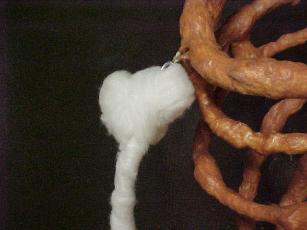
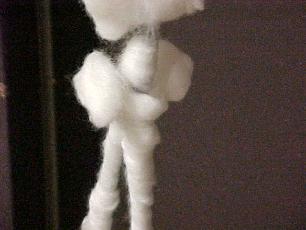
Now that the frame is complete I can add the cotton. The first thing I do is make sure all the ends of the wire are bend in to prevent any sharp areas. Next I unroll a ball of cotton and wrap it around the tubing and wire. I then wrap another piece of cotton making sure I over lap the last piece. This will keep all the cotton nice and tight for brushing on the latex later.I applied cotton to some of the ribs in the picture on the right.


In the picture on the left I have half the ribs covered. The other picture show the complete rib cage covered.You really don`t notice the support pieces I installed between the ribs.I double wrapped some areas to build up more bone. I can added more cotton later if I don`t like something.
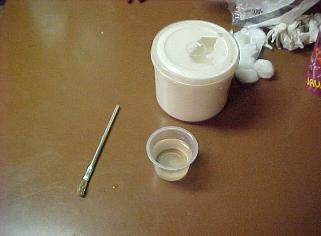
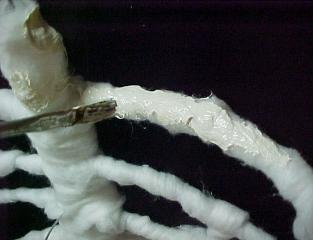
My tools for adding the latex to the cotton are just a brush and a cup of water.I dip the brush in the latex and lightly apply a coat to the whole project. I take my time doing this because if you go to fast the cotton will pull off. I just want to cover everything with a light skin. This coat takes the longest to dry. Between coats I keep the brush in the cup of water.This keeps the brush from drying. Also you have to keep cleaning the brush because some of the cotton may stick to it. I also wipe the brush before I place it in the water.

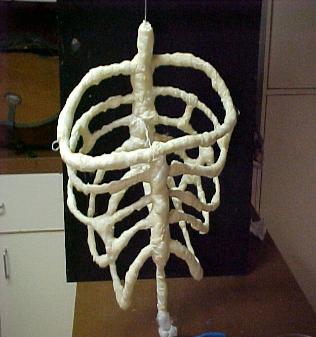
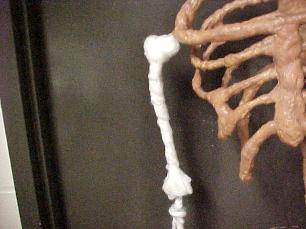
This is what it looks like after the first coat dries. The second & third coats dry as you put them on.


Here somes side views with the second coat of latex still a little wet.
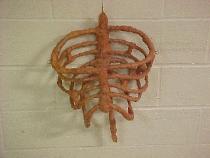
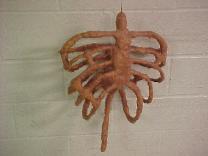
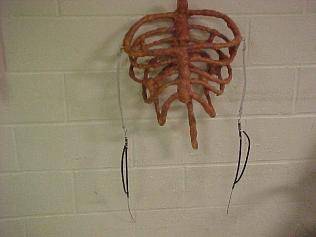
This is the rib cage after two more coats of latex (brown). I think I`m finished adding latex to this part. Next I`ll making the arms.
Adding Upper Arms

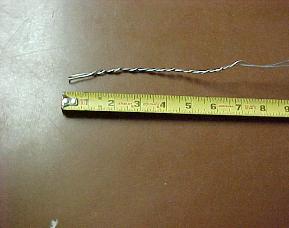
The first thing I did was cut two pieces of plastic tubing to 12″ and two pieces of 16 gauge wire to 20″. I then place the wire into the tubing leaving 4″ of wire sticking out of each end as in the picture on the right.

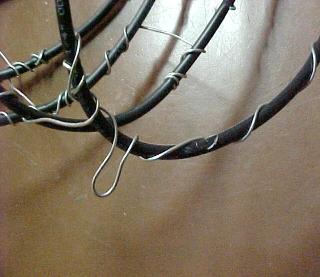
I`ll be working on one arm for the rest of this project to avoid confusing anybody.( just repeat process for the other arm later) Pick one end of the tube to be the top.Once you have your top measure 3″ from the tip of the wire coming from that end. Now bend the 3″ section of wire back over the plastic tube. This should leave you with something like the picture on the left. Now place the wire thru the loop you made on the rib cage were the arm connect to it.On the right you can see I just wrapped the wire around the tubing making a connection and leaving a little loop. If your going to use this frame for a crank ghost you need the loop for the arm movement.
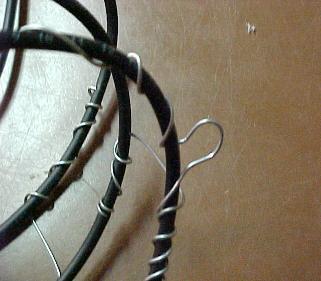
Now your upper arm should look like the picture on the left. I then did the same thing and bend the wire back over the tubing on the lower end of the arm.


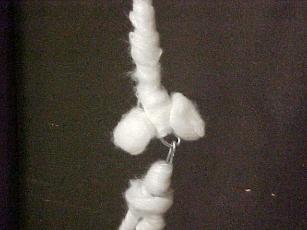
I then wrapped the wire around the tubing leaving about a 1″ loop as in the picture on the left. This loop is were we will connect the lower arm to. On the right you can see the rib cage has both upper arms connected. Once you have completed this go to the next page to do the lower arm.
Adding Lower Arms

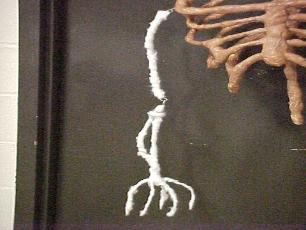
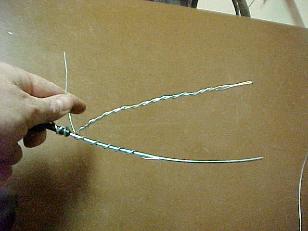
The first thing I did was cut two pieces of 1/4″ plastic tuping 11″ long. Next I cut two pieces of 16 gauge wire 30″ long. Now place the wire in the tubing. Pick one end of the tubing to be the top. At the top you want to have 4″ of wire sticking out this end. Now bend 3″ inches of that wire back over the tubing and connect the lower arm to the loop on the upper arm as in the picture on the right.Once you have them connected wrap the wire around the tubing .

Now do the same to the other side and you show have something like the picture on the left. If this is driving you nut just look thru the picture.After you do it once you should get the idea. Next I cut two piece of 1/4 tube 8″ long.Then cut two pieces of 16 gauge wire 14″ long.This wire goes in the 1/4 tubing. Now your going to add the second bone to the lower arms.

Now before you doing anything look at the above picture on the left thats the way the bone should be placed. Now connect the second bone by bending the wire around the top first.If you picture doesn`t look exactly like mine do worry I`ve been doing this longer.Just as long as it`s secured.
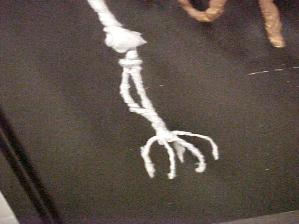
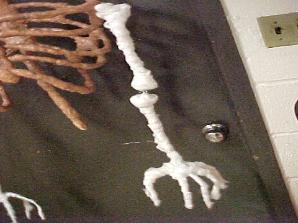
Now connect the bottom wire to the wrist area. and you should have something like the above picture. Notice the wire after the wrist in the picture on the right. That piece of wire is one of the fingers.

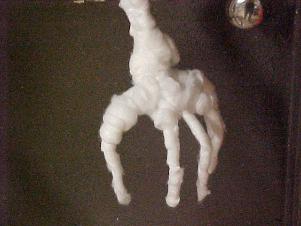
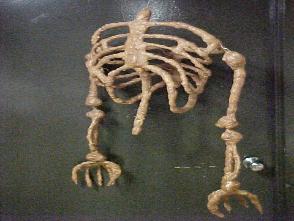
In the above picture you can see the arm are starting to look like arms.The picture on the right is after I bend the arm a little at the shoulders.
Adding Hands


Building Bones Again