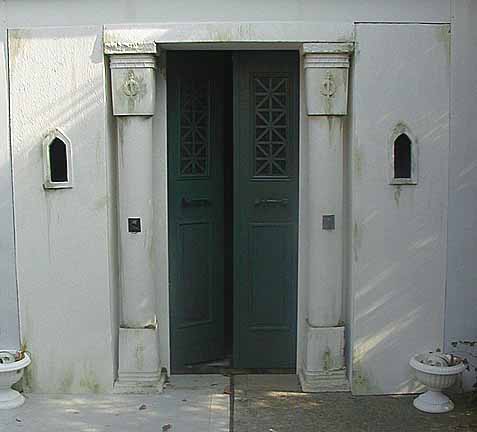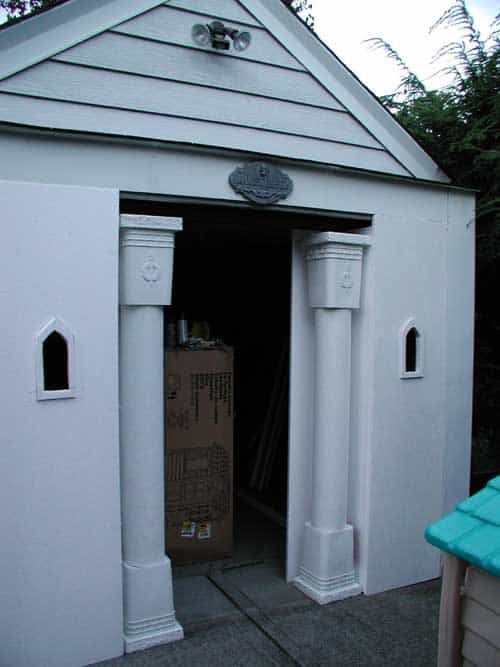
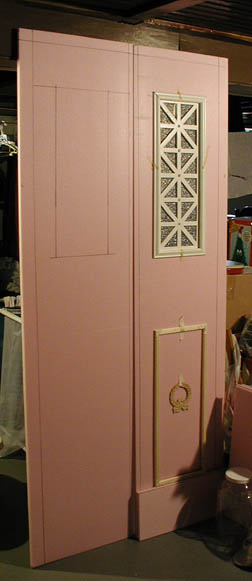
This is a shot of the mausoleum in progress. The entire facade is made from 1 in thick styrofaom cut to fit the opening of my garage. The columns are made from plastic buckets and cardboard cement foundation forms from Home Depot.
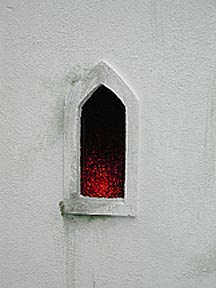
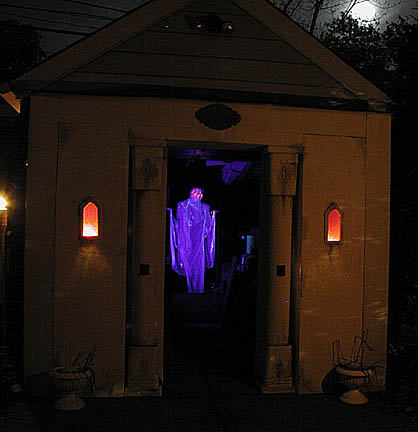
The 4″ x 10″ windows are covered from the inside with a blood red gel used for lighting effects and behind that is a piece of a clear “cracked ice” lighting panel to give a stained glass effect. I mounted 7W bulbs behind each window and are enclosed and covered with black plastic bags so as not to disrupt the black light effect for the Ghost.
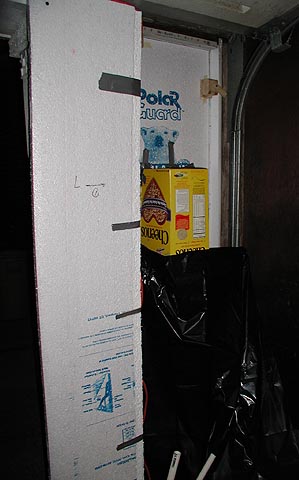
This picture shows the interior of the mausoleum, the lights are enclosed by the cherrios boxes with an opening cut to fit the shape of the windows. Since the facade panels were made from regular styrofoam I chose to use as lightweight of an enclosure as possible; the cereal boxes worked great. The plastic bag is draped to further contain any light that leaks from the box.
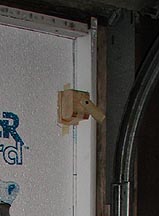
The side panels are held in place by 4 tabs glued to the foam along each outer edge. They consist of wooden blocks to match the depth of the garage front (approx 2in) and a rotating tab made from 1/4in plywood.
The Mausoleum as seen in the day and at night to house the Flying Crank Ghost.
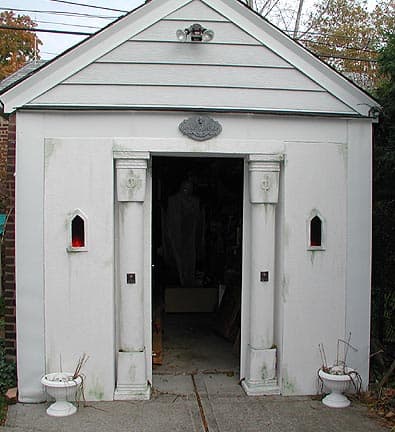
The entire surface of the panels and columns are covered with a very thin layer of joint compound mixed with flat white latex paint to provide a texture. Subtle mold and moss shading is added to enhance the facade using a watered down green and black latex paint.
Mausoleum Doors
In the continuing evolution of my yard display, I have created motorized Mausoleum Doors to enhance the Mausoleum scene from last year. The intent is to hook the doors and FCG to the motion detector already attached to the garage; upon activation a timing circuit will cause the doors to slowly open inward and the FCG/black light/ and ghost sounds will begin.
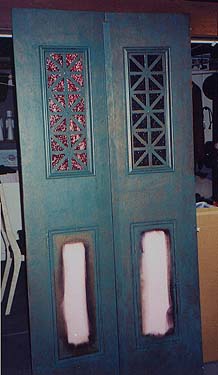
These pictures show the early construction of the 2 doors.
They are made from 3/4″ foam, the “glass” is a piece of cracked glass panel used for lighting fixtures cut to fit in the opening.
I used some chair rail molding as trim for the top opening and to act as a stop for the panel and glass.
Plaster castings of hand hammered nail heads accent the center line.
To make the triangular patterns, I made a design (PDF format) on the computer, printed it out, traced it 3 times in a vertical line to a piece of foam board and then cut the appropriate sections out using an exact-o-knife.
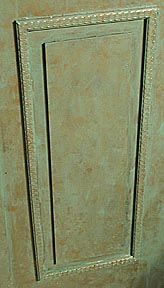
The lower panel is made from 3/4″ Wheel molding. The wreath relief pictured was an early trial but I ultimately decided on a raised panel look made from foam board.


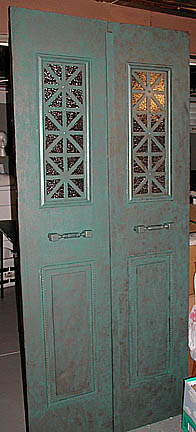
For a realistic look, the doors are given a flat black base coat with a paint brush. Then I used Rustoleum’s Patina Paint Kit to give the doors that antique copper look. I was able to cover both doors and the handles with one can of the copper base coat included, but just barely.
I found out that you really don’t need to completely cover the object with the copper base coat. A light coating and then the patina can give the appropriate finish.
The handle is made from 4 main components: 1-1/4″ square wooden block, 1/2″ PVC, threaded rod and cast lamp finials.
I made a silicone mold of a lamp final and cast 4 copies, carefully drill a hole in the center of each finial and wooden block, a 2″ piece of PVC is sandwiched between the finials and blocks and the threaded rod is secured with nuts at both ends.
A hole is pre-drilled in to the back of each block for mounting. A 1″ piece of PVC separates the handle from the door and 3″ drywall screws are used for securement from the back. I had to trim a 1/4″ off the tip of the screw as to not split the blocks.


For the Mausoleum scene, I originally intended the doors to be closed, then when the motion detector is triggered they would slowly open at the same time. Since I was using 120Vac motors, there was some concern regarding the timing of the doors opening and closing properly. Since I made a flange on one door edge to cover the seam between the doors as actual doors have; the door without the flange had to open first, then the door with the flange would need to close first. Otherwise there was a chance that the doors would bind and get damaged.
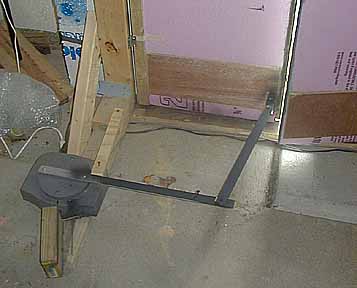
Since time was short, rather then work thru that problem, I decided to motorize only the door with the flange and the other door would be left open. I used the base of an oscillating heater and added a couple of 1″ wide aluminum bars for the linkage. I made a small l-shaped bracket from scrap aluminum to connect the bars to the door.
A wide piece of 1/4″ thick luan is securely glued to the bottom of the foam door with Liquid Nails construction adhesive for connection to the linkage. I used some scrap pieces of wood as stops for the motor. When the linkage hits either stop it automatically reverses direction. Since this is how fans/heaters normally oscillate, I just changed the angle at which it reverses to suite my needs. With the angle of the linkage to the door is about 100° and the angle of rotation for the motor is about 80°.

This is a picture of the finished Mausoleum Doors mounted in the frame with the mausoleum facade.