
Let me start out by saying that I am a novice at mask making. The mask shown in this guide was one of the first few that I had done. This how-to is designed just to give you a basic idea of how a mask is made. For more information about mask making from people that are Professionals check out Monster Makers , Death Studios or Latex mask Centeral. Death Studios also sales a great video on mask making that I highly recommend.
Sculpting the piece
I like to use oil based clay. Water based clay will dry out if left out to long. Oil based clay will never dry or harden. I tend to start on a project and then it may be weeks before I get a chance to finish it. So the oil based clay is the better choice for me.
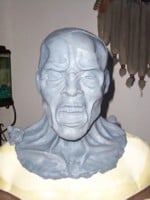
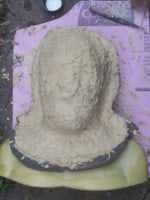
I start out with a Full Head Armature and apply clay to get a rough form of the mask that I want to make. This mask will not be worn. It will be a prop head when finished. Latex likes to stink so if the mask was being made to wear I would insure that there was at least an inch of clay over the armature to account for shrinkage later on.
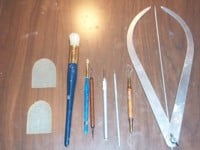
Here are some of the tools that I use.

It is a good idea to measure the sculpture to assure that it is symmetrical. I often check the eyes nose etc as I sculpt.
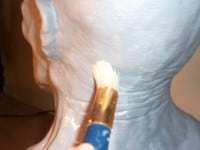
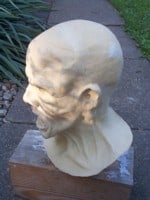
Once the head has taken the shape that I am looking for I start to lay in the wrinkles and creases that will give it character. I use a sculpting knife to add the lines and then brush over them with a brush dipped in alcohol. This smooth’s it the lines and give a very realistic effect.
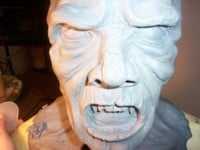
Texture stamps are great for saving you time. The stamp is just pressed onto the clay to transfer the texture. Alcohol can be brushed over the area to blend it even more.
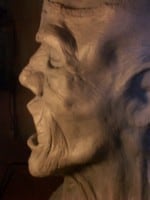
One trick that I like to use is to use a small spot light in a dark room to better see the details. I move the sculpture back and forth to get an idea of how the fine lines will look.
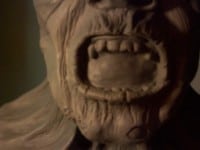
Here you can see the detail work that I was doing to the teeth.
Once that i feel the sculpture is complete I brush it lightly with one last coat of alcohol. Once that dry’s I coat it with a very fine spray of clear coat. The acts as a release agent. next its time to made a dividing wall around the sculpture.
This will be a two piece mold so I need a wall to divide the two half’s. Here you can see the wall that I built. I am not the best at making these walls but I am getting better. I use a brush handle to make the divots in the wall. This will help realign the two half’s later.

Here is a closer look at the divots. The wall is made from strips of water based clay. It will not stick to the oil based clay and will be easy to remove later.
Once the wall is made I mix my plaster and pour it over the sculpture. This goes on in several coats. the fist coat is the detail layer. once that coat is finished I do another layer. the next layer I use burlap soaked in plaster and lay it over the previous layers. This will strengthen the mold.
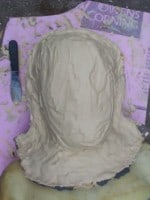
I do about 7 layers of plaster. Three of those contain burlap. The top half of the mold is now finished.
After the last plaster layer is set I flip the mold over to start on the other side. The dividing wall is then removed.

Here you can see that I have removed the wall and made small rectangles out of clay and lay them on the seam of the top half of the mold. this will be for prying the two half apart later. I have also built a wall at the base of the mold. This will just give the mold a well defined lip for pouring later. Vasoleen is then brushed on the seam. this will help keep the two half’s from sticking later.
The second half of the mold is made in the same manner as the first. First a detail layer of plaster. And then more plaster and layers of burlap.

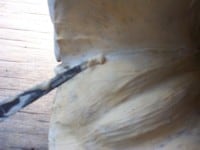
Once that both half’s are dry I lightly file the seam edge with a rasp. If you look closely at the picture you can see that a fine line will appear this is the seam line. Don’t file to much! You can also see the clay that was place on the seam. These are the prying spots
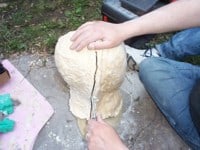
Now for the scary part. You have to work screwdrivers into the spots were you put the clay. slowly pry the two half’s apart. The photo shows my prying with one driver at a time. this is not a good idea. it is better to pry with two screwdrivers at the same time. But remember Slowly!

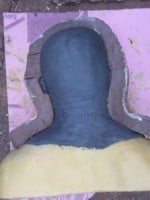
Here you can see the two half’s. Some clay will stick to the mold half’s. I a tooth pick and tooth brush to get out as much clay as I can. The mold needs to be clean.

A little latex poured into the mold and allowed to dry can lift out any fine clay that is left.

Once the clay is gone. You can fix any air bubbles with a small bit of plaster. I also clean the mold with alcohol to prepare the mold to be rejoined. A thin layer of plaster is put on the seams to “glue” them together.
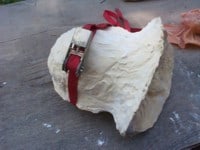
A wench is used to hold the two half’s together. Try to get a good tight fit but be cartful not to break the mold.
The inside seam lines of the mold can be sealed with a small amount of plaster on a knife. This will help with flashing later

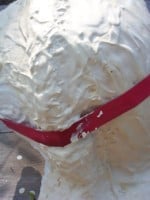
This is a close up of the seam after it is filled.
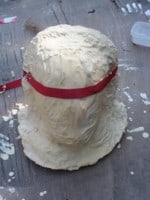
Plaster is then used to seal and join the two half’s. I also use strips of soaked burlap here.
You will want to remove the wench after the plaster dry’s. Don’t cover it. Once this layers are dry you can remove the wench.
Now for the latex!
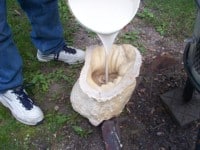
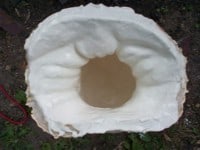
I let the mold sit for a few days then its time to make a mask! Find a place that yo can stand the mold up side down. Make sure that it will not fall over. and slowly pour the latex into the mold.
Here is the mold full. You can splash the latex around to get any uncovered areas. Allow it to sit for some time.
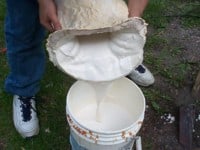
Now you can pour the latex back into the bucket.
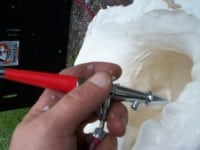
An airbrush is then used to pop any bubbles in the latex. Not much air is needed.
After the bubbles are gone fill the mold again. Allow it to sit for some time to give it a good skin.

After the second coat I allow the mold to drain.
Now I find a safe place to let it set over night. Once the latex is dry it will start to put away from the mold. Remember I said it would srink.
The Mask

Here is a simple mask stand that I use to prep the mask after it is cast. Its made from a peice of wood and a piece of PVC. Plastic bags are used as filler.
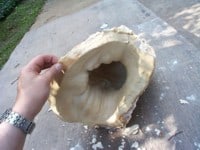
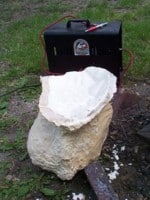
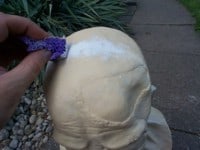
Here you can see the mask still in the mold It is now ready to be removed.
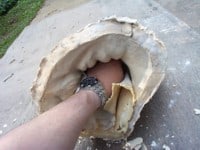
Carefuly work the mask away from the mold. Take you time. Once the mask is loose it can be removed.

There you have it A new mask! But its not done yet. It had to be trimmed.

Here you can see that by filling the seam there was very little flash. This has to be removed.
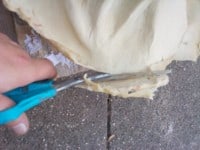
But first the flash is remove from the bottom. A pair of sisors works fine.

The edge is trimmed!

A rotory tool is used to remove the flash left by the seam. Take you time! You dont want to remove to much.
After the flash is removed use a spunge to stiple latex over the area were the seam was.
Now that it is dry the seam is gone.
All that is left to do now is paint it. I am not going to go into that step.
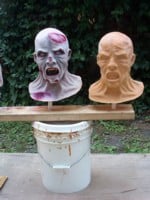
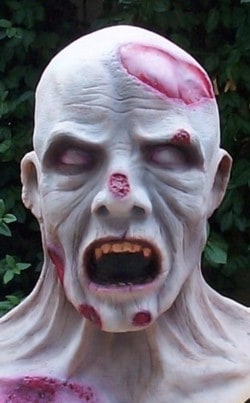
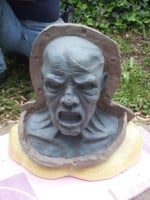
Here are two of the same masks.
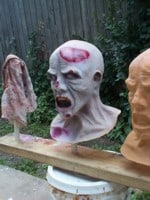
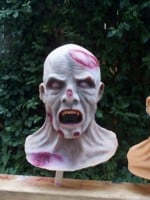
After the mask was painted I used clear fingernail polish on the teeth and eyes to give them a wet look.
I hope that you enjoyed the how to for beginers by a beginer. As I said before there are many great sites on the web that can help you get started.