
For the past 2 years I have sat at the front door to scare the children as they come to the door to get the candy. As people were getting used to me scaring them in the same spot yearly I decided to change things and replace myself with a static prop.
Materials needed
- PVC Pipe
- PVC fittings that will fit the pipe
- Small piece of plywood
- Bag of ceiling spackle
- At least one can of latex paint
- Burlap
- Epoxy
- Zip ties (you can use wire but I prefer the zip ties as they can’t come undone.)
- Spray bottle
- Poster paint (brown)
- Chicken coop wire
- Wire mesh (get the stuff with about 1/2 holes)
- A half a big ball of foam you can get these at a craft store or use a wig stand head (personally I used the back end of a malformed home made foam skull)
- Something to attach the pipe to the ply wood (your going to have to figure this one out on your own)
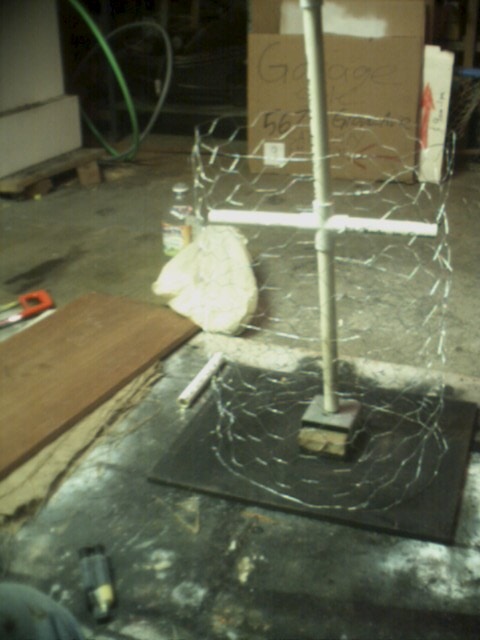
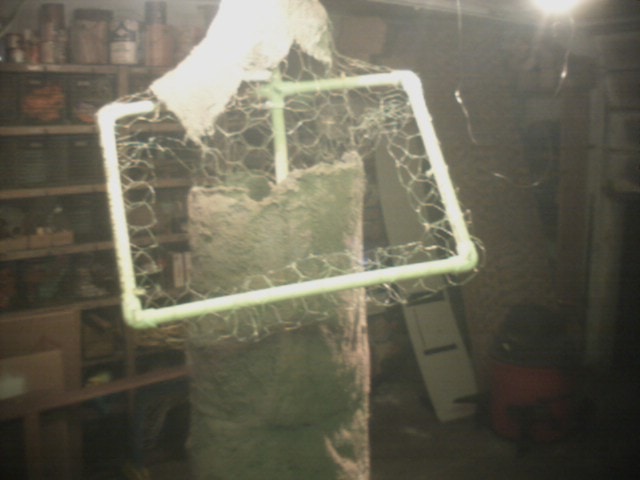
First cut a chunk of the PVC to about 1.5′ in length and attach it to the plywood. Next epoxy a PVC T on top of it then epoxy (2) 0.5′ pieces into the T as well as another 1.5′ piece in the top. Do not skip putting the crosses in your character as they will make it allot stronger and easier to move him around. Now form the chicken coop wire around your lower part of the frame to create the base of the body and staple it to the plywood. Put a small hole in each of the short PVC chunks so you can attach the chicken coop wire. Next connect the chicken coop wire to the PVC using the holes you put in the PVC and a zip tie. Don’t finish making the entire body just yet as you may need access inside him while you’re working on him.
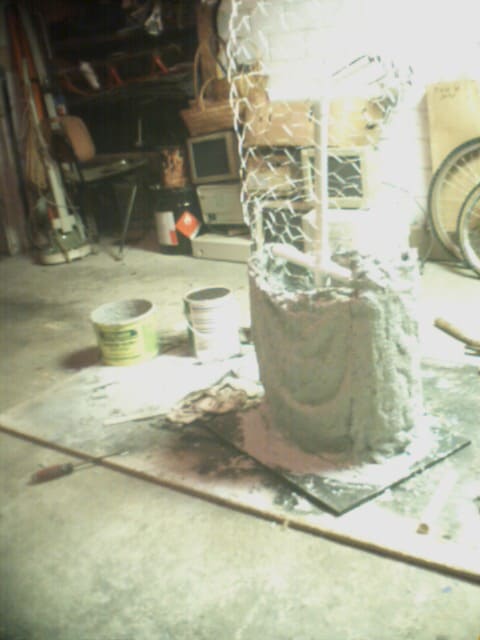
Next you’re going to want to start mixing your ceiling spackle monster mud. It’s basically the same procedure as regular monster mud except because ceiling spackle is chunky powder you need to add water. First start by putting some ceiling spackle in a container then pour some paint in. Next add some water to it and stir it adding more water until you get the consistency you want. Next you’re going to want to cut your burlap into approximately 2′ squares for working on the body. Dip the burlap into the monster mud until the burlap is soaked and totally covered. Pull the burlap out of the monster mud and grab onto one corner with one hand. Form the index finger and thumb of your other hand into sort of a circle around the top of the monster mud soaked sheet and grab on to the sheet and pull it down to get the excess mud off the sheet. Next put the sheet over the chicken coop wire hanging the top corners through the wire. Put the rest of the sheets on following the same procedure. next stick one hand into the monster mud and take some out rub your hands together and use them to hide the seems by rubbing your mud covered hands over the seems.
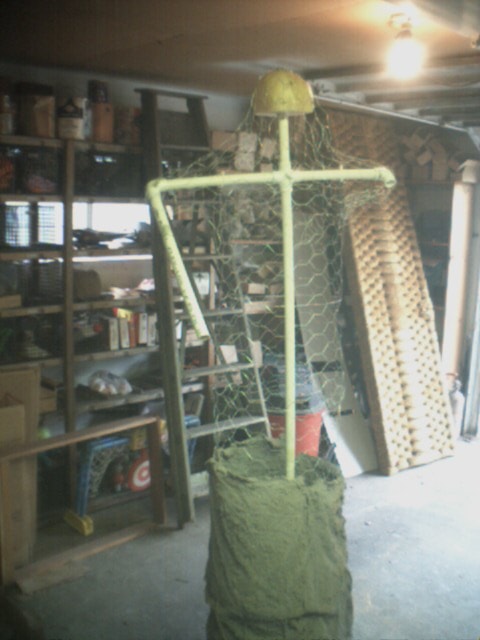
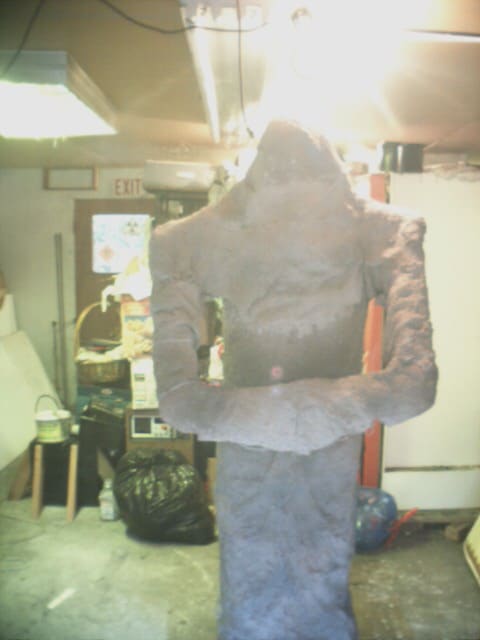
Continue following the procedures above until you get him about eye height (depending on how tall you want him and how tall you are). Now stand in front of him and measure how far it is between your shoulder and the middle PVC pipe. Add an inch or two and cut two pieces of PVC to that length and epoxy them in the top T (you are remembering to epoxy it right). Now cut one more chunk a little shorter then the height you want him and put it in like a neck. Next put the “head form” over this as you can see in the picture. Now chicken coop wire the last of the body. to make the chicken coop wire stay on the head part I used “horseshoe nails” they are little U shaped nails that are normally used for nailing down wires I don’t know exactly what they are called I just found them in the garage.
For the arms use the same method sxplained above for the shoulders. Forming them into a square is probably the easiest. Now as you are building him he may seem to lean backwards DO NOT COUNTER WEIGHT HIM IN THE FRONT. I tried filling the arms with sand to make him lean forward a bit more unfortunately when I put the mud on his arms the added weight made him lean forward too much and I had to drill holes in him to drain the sand. If he still leans backwards after you finish him you can always put a small hole in the arms and fill them with small Ziploc bags filled with sand.

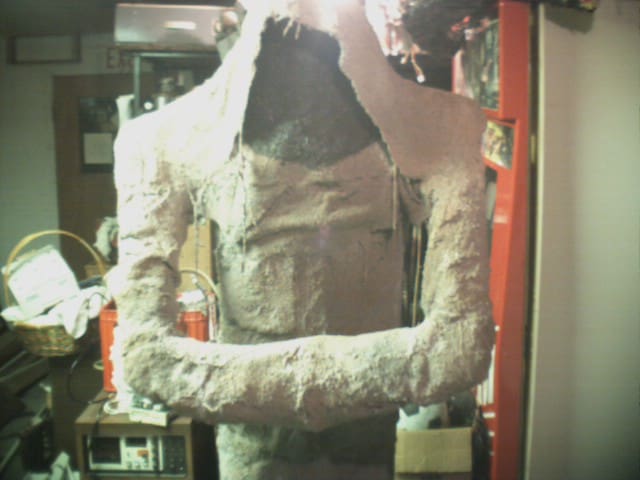
Now monster mud the arms. if you haven’t already start cutting your 2′ square sheets of burlap in half they are much easier to work with on the arms at one point I even wrapped a long length of 0.5′ X 4′ burlap around one of the arms… just use what you feel works. as your Working the burlap will probably try and fall off use zip ties to hold the burlap onto your creation until it dries (you can see them sticking out in the picture)
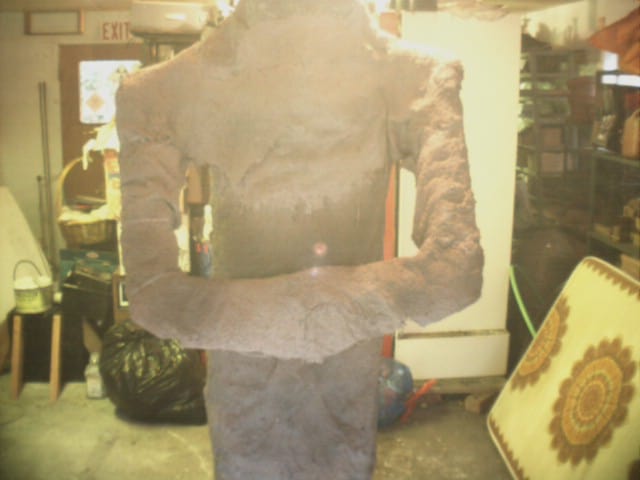
Now finish off the arms and remove the zip ties… yours won’t have the noticable lines in the picture above as I decided to spray “texture” on him early.
Now unfortunately I didn’t take pictures of the next step so bear with me as I describe it… take a chunk of the wire mesh hold it onto your monk where you want the hood to be so you can messure how far down the sholders you want it. now the bottom of the mesh will be straight but your going to want to cut the other end at an angle to get a sort of “wave” that looks sort of like this ^ only much more curvy. Use those U nails again to attach it to your character then burlap mud over it leaving some of the burlap to hang over the edge of the hood.

next mix the poster paints and some water into the spray bottle making sure its thin enough to go through the nozzle but not too thin and spray him with it… it gives him a sort of dirty muddy look and shows off the wrinkles in the burlap allot more. Finally take some black paint and paint in the “void” for his face as you can see in mine. And you’re done. If you’re not putting him in a covered area you may want to water proof him but you’re on your own for that.