The opening coffin involves a coffin with a lid and a gear motor inside that opens and closes the lid. Adding a skeleton to the inside attached to the lid will make it look like the skeleton is trying to get out. A great effect no graveyard should be complete without. This project will explain how to put the gear motor into a coffin. Building the coffin is up to you on what size you want to make it. This project will explain how to install a gear motor into a full size coffin. The procedure for a smaller coffin would be the same except you could use a smaller motor.
Construction:
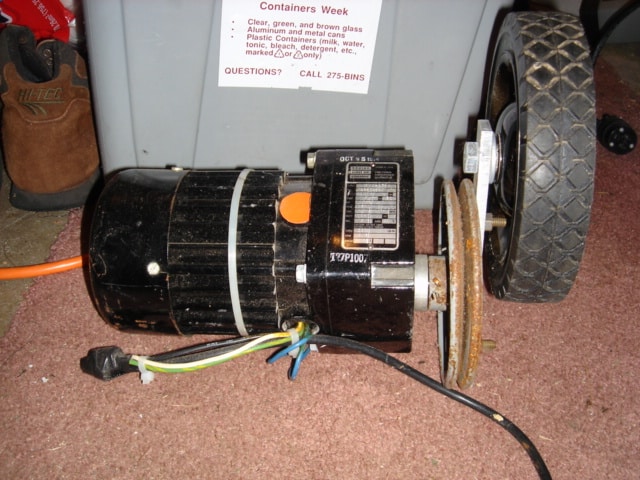
- Gear Motor that is 1/15 hp 10 RPM
- Cotter pin fits 1/8 inch hole that is 2 inches long
- Standard lawn mower wheel
- A piece of 1/4 inch thick 1 inch wide 7 1/2 inches long aluminum bar
- Two 1/4 inch bolts that are 1 1/2 inch long and two nuts for the bolts
- A 1/2 bolt that is 3 inches long two washers and one locking nut that fits the bolt
- A 5 inch diameter V- belt wheel that will fit on to the shaft of your motor
- Some scrap wood to mount motor into your coffin
The way this project will work is the motor will have an arm attached to it with a wheel on the end of it. The motor will be mounted inside the coffin and as the motor rotates the arm , the wheel will push up on the lid and open it.

The first step is finding a motor that handle this type of load. The motor that I used was Bodine 1/15 hp with 10 RPM motor from C & H Sales Company. You can find them in my Links page. This motor has a 5/8 shaft and also has a hole drilled through the shaft. The arm is a piece of aluminum that is ¼ inch thick and 7 ½ inches long. The arm attaches to the motor using a 5 inch diameter V-belt wheel. The other end of the arm which opens the lid has a 6 inch lawn mower wheel attached to it.
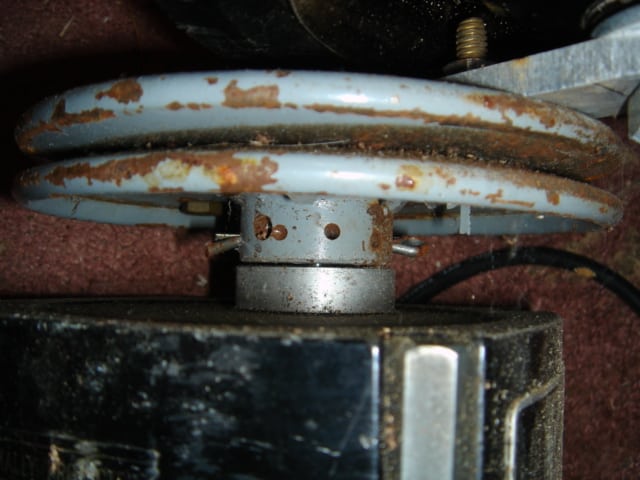
To start this project take the V-belt wheel and you want to drill a 1/8 inch hole through the center where shaft attaches to the motor. That’s if you are using the same motor that I am using. Your going to need an extra long 1/8 inch drill bit as the wheel its self gets in the way when drilling. This hole needs to be the same size as the hole in the shaft of the motor. If your motor does not have a hole through the shaft you need to drill one. You should drill a 1/8 inch hole to match your 1/8 inch on your V-belt wheel. The idea of putting a hole in the shaft of the motor and the V-belt wheel is to lock the two together with a cotter pin. Use a stainless steel cotter pin if you can because a softer metal pin I have found will break after a while. Do not attach the V-belt wheel to the motor yet.

Next you want to drill two holes that are ¼ large on the face of the V-belt wheel. Drill a two hole 2 inch from the center of the shaft on each side though. These two holes need to line up in a straight line. Once you have the holes drilled in the V-belt wheel you need to drill two holes in the aluminum bar in the same place so they line up with the holes in the V-belt wheel. You want the end of the aluminum bar that you will be not attaching a wheel to over lap the edge of the V-belt wheel just a little. Next you need to drill another hole on the aluminum bar to attach the lawn mover wheel to. Your lawn mover wheel should have a ½ inch size hole for a shaft to go through. You need to drill a ½ inch size hole in the end of the aluminum bar where you will be attaching the wheel to. Once you have the hole drilled for the wheel you can attach it to the aluminum arm. Use a ½ inch diameter bolt that is 3 inches long. Slide that through the hole in the bar then put a washer on, then the wheel, then another washer ,and last a locking nut. Do not tighten the locking nut all the way down, you need the wheel to turn freely. Now attach the arm to the V-belt wheel using some ¼ inch blots that are 1 ½ inch long and tighten these two bolts down with some nuts.

Next you need to attach the V-belt wheel to the shaft of the motor. To do this just line up the hole that you drilled on the V-belt wheel with the hole in the shaft of the motor and insert a stainless steel cotter pin and then the bend the ends so it does fall out.

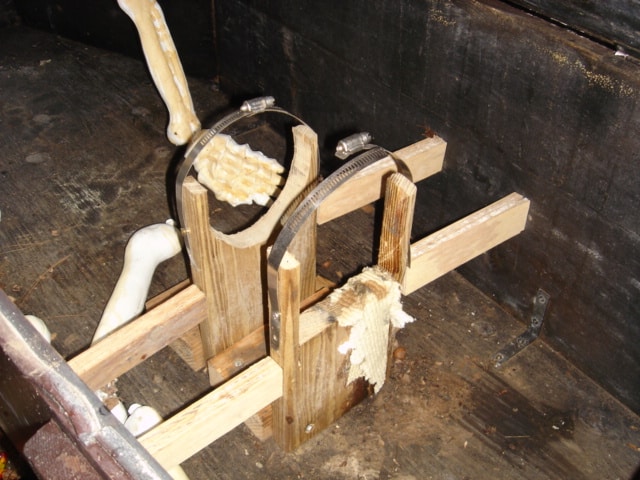
To attach the motor to the coffin you are going to need to build a platform for the motor to sit in. The platform that I used is some scrap 1 X 6. Cut the wood out in a shape so that the motor sits firmly in the wood. Also add some wood on both sides of the motor for added supports. I also added some pieces of metal strapping to help keep the motor firmly in place. The best place to put the motor would be the center, but if you are using a skeleton in the coffin you might put it off center to give the skeleton some room. Make sure you know which way your motor rotates so you mount it in the right direction. If you have not done so, you need to attach some hinges to your coffin lid.

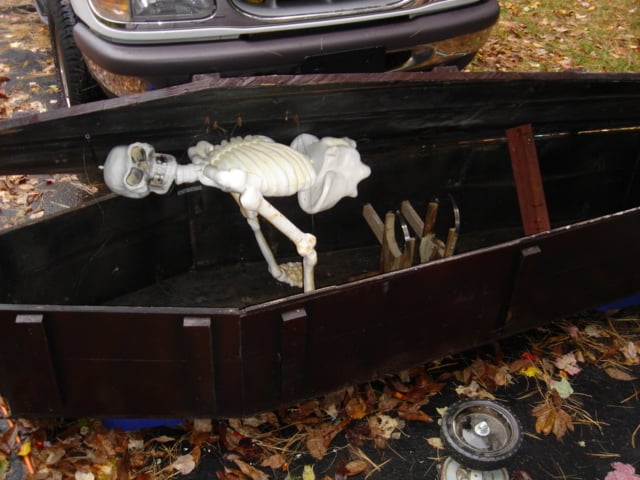
This picture shows the whole coffin complete with skeleton attached to the lid of the coffin. The purpose of the skeleton attach to the lid is when the coffin is opening and closing the skeleton will look like it is trying to get out.

