In 2009, we saw a commercial Halloween prop on the Internet that looked pretty interesting and thought it would fit into a new scene we had envisioned.
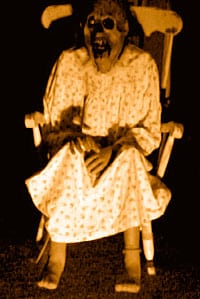
The commercial prop featured an old lady rocking in a rocking chair who spoke to Trick-or-Treaters as she rocked. The neat part was the prop seemed to rock on its own without being connected to an external mechanism.
We did not have the funds to purchase that commercial prop so we decided to build our version.
Scary Terry had built a wiper motor rocking chair, but it was not exactly what we were looking to do. However, the use of a wiper motor to power the prop seemed like the way to go. So we created a design in our heads that we thought might work. Then we headed to the local home improvement store for a few supplies, pulled out an extra wiper motor when we got back and came up with a prop that worked perfectly the first time.
Building a Wiper Motor Rocker Halloween Prop
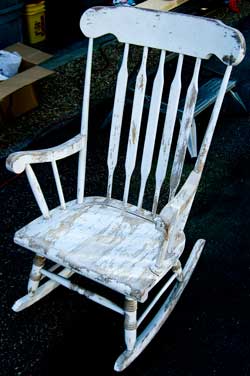
We started this build with a rocking chair that we’ve had for more than 19 years. It’s old and weathered and sorta creepy on its own. But a decomposing old woman rocking away will be a lot more interesting. One of the things we did not want to do was to make the chair unusable after Halloween. So the prop is self contained and removable for storage and does not damage the chair.
A wiper motor is needed for this prop. We already had a 12VDC wiper motor that was purchased a couple of years ago. The one pictured is no longer available but Monster Guts sells a similar one. We also needed about 4-feet of 2×6 pine board which forms the base of the unit.
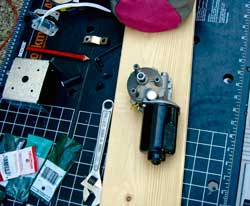
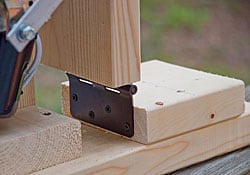
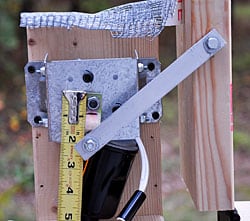
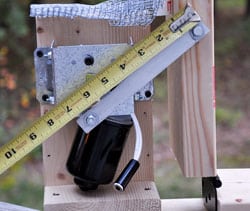
We used Scary Terry’s technique of using a 4×4 post cap and a couple of brackets to create a mount for the wiper motor. The motor is secured with 6mm screws.

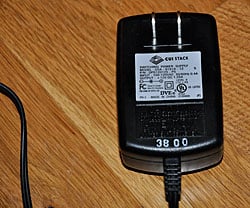
We used 12 VDC 1.5 AMP power supply.
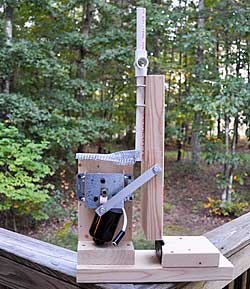
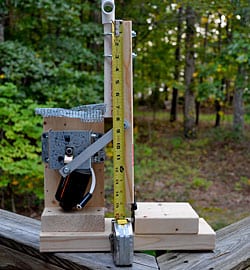
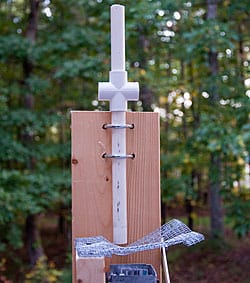
Here is side view of completed mechanism
A 15 inch section of 2×6 forms the base plate. A 5.5 inch section is attached 1.5 inches from the front of the base.

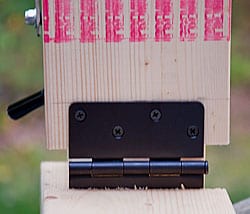
A 4 inch hinge is attached to the 5.5 inch section
The other side of the hinge is attached to the torso section.
The torso section is 15 inches long.
A 2.5 inch section is attached 1 inch from the right side of the base plate. This adds support to the motor mount upright.

A 10 inch section is used as the motor mount. The motor is mounted so the drive shaft is about 8 3/4 inches from the bottom of the base plate.
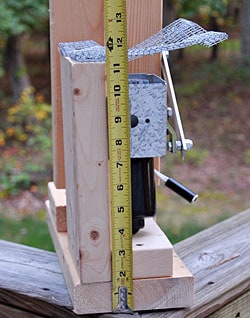
The 2.5 inch motor arm is attached to the drive shaft and the crank arm.
The 7 inch crank arm is attached to the motor arm and the torso upright.
Wiring is attached to the motor and a quick connect jack. We used the low speed connections as described on Scary Terry’s web site.

Here is the hardware connections at the motor. We used a 1/4 inch bolt with a lock washer and nut on the motor arm followed by a washer then the crank arm then another washer and finally a lock nut. The bolt must be tight against the motor arm but the outside lock nut must be loose enough to allow the crank arm to move freely.

The other end of the crank arm is attached 8.5 inches from the top of the torso section using a 1/4 inch lag bolt and two washers. This connection must also be loose enough to allow the crank arm to move.

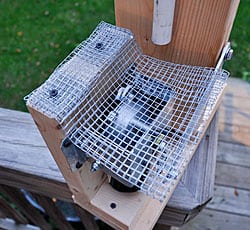
We used a piece of hardware cloth screen to create a guard to keep any material from the prop from snagging in the motor as it turned.
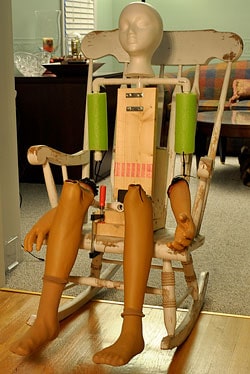
Two pieces of 1 inch schedule 40 PVC pipe were attached to a 4-way connector to create the connections for the prop shoulders and head. The pipe was attached to the torso with two u-bolts.
Four pieces of 1 inch PVC pipe and two 90 degree elbow fittings were used for the shoulders and upper arms. A couple of pieces of foam from a pool noodle add some bulk to the arms. The styrofoam wig head will be covered by a mask.

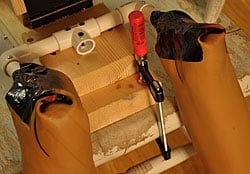
More PVC pipe and fittings are used to attach the legs to the base. The legs are Don Post severed legs with the tops removed.
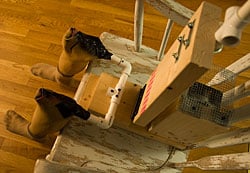
Four inch clamps are used to secure the prop to the front and back of the chair.
This the completed, undressed prop. The two Don Post severed arms are loosely attached with zip ties to the PVC arms. Take a look at the video below to see it in action.I’ll post additional photos after Halloween.