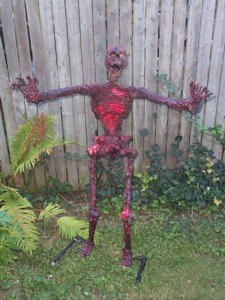
Ever want to make that Cheapo skeleton look really hot? Well, here ya go. This project is cheap and very easy to do. It took me only a few hours to complete.
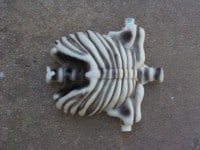
Start by taking the skeleton apart. You will want to resize the blown plastic skeleton to make it closer to human size. Cut holes into the chest at the neck, spine, and shoulders so that you can insert PVC into them. Slide a piece of PVC into the shoulders and cut the PVC Leave about 1″ on each side.

Next, you need to cut holes in the hips. Cut out the top as shown and cut out holes for the hip joints. Take 2 pieces of PVC about 4 inches long and slide them into the holes and attach them to the Tee connector.
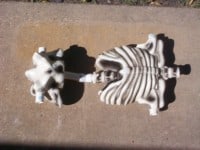
The biggest problem with the cheapo Skeleton is that the hips and chest are too close. Measure from your shoulders to your hips and cut a piece of PVC to that length. Insert the PVC into the tee and the other end into the tee connector. About an inch below the chest cut the PVC and insert a 45 deg connector. This will give your prop the appearance that it’s leaning forward to grab someone. At this point, you will want to drill the drywall screws into the joints and into the back of the chest to secure the PVC
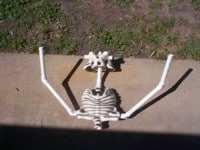
Measure from your shoulders to your elbows and from your elbows to your wrists. Cut pieces of PVC to those lengths to make the arms. You will need two 45-degree connectors for each arm.
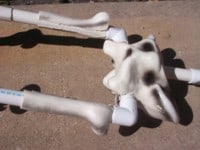
Do the same for the legs. You will need a 90-degree connector for the hip and a 45-degree connector for the legs. After you have made the legs find the old legs from the skeleton and cut the bones at both ends so that the PVC will slide on. You may have to split the bones with the saw to get the PVC to slide in.

Do the same for the knees. Make sure that the bones are close to each other. You can also add the feet at this point. Cut holes in the old feet from the cheapo skeleton so that you can slide them in place.
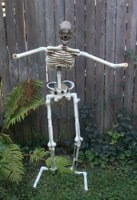
Now for the head. Cut two pieces of 4-inch PVC and connect them together with a 45-degree connector. Slide one end into the chest. Hole a hole into the base of the skull and slide it over the other end of the PVC Once the new Skeleton is complete you will want to add a stand. Cut two 4-inch pieces of PVC and connect them to the feet with 90-degree connectors. If you are going to use the prop in grass Install two more 90’s and attach 5-inch pieces to them. You can drive them into the ground. If you are going to use the prop indoors use longer 12-inch pieces Pose the prop as desired and lock the joints into place with drywall screws.

The arms and stomach need to be thickened up. Wrap the arms in newspaper and tape it in place. Do the same to the stomach. Also, tape some paper to the hip joints and tape the bones of the legs in place.

Cut the coat hanger to make the fingers and tape them in place with duct tape. ( I know, The picture shows the great stuff already applied. I could not wait. But we will get to that.)
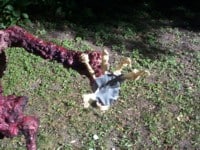
With masking tape thicken up the fingers.

OK, now for the Great Stuff. WEARING GLOVES spray Great Stuff onto the prop and smear it over it. Let it sit for a few minutes and then work it with your fingers to fill in any holes. You might want to work on one area at a time. The arms then the chest and so on.

As the Great Stuff starts to become tacky use your fingers to pull the Great Stuff down. Make drips so that the skin seems to be dripping off the bones.
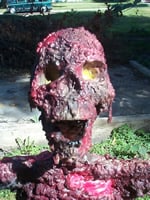
Once you have covered the body and the Great Stuff is hard it’s time to paint it. Start with the red and cover the prop. With the Flat black, mist the prop to give it a burned look.

If you want to add a little more gore to your prop you can chip off some of the Great Stuff from the chest to expose the ribs. Then paint them red.
That’s about it. I told you it was easy.
Supplies
Parts List
| Cheapo Skeleton | 1 |
| Cheapo Skull | 1 |
| 3/4″ PVC – 10 ft | 2 |
| 3/4″ tee | 1 |
| 3/4″ 90 deg | 4 |
| 3/4″ 45 deg | 8 |
| 1″ Drywall Screws | 1 box |
| Metal Coat Hangers | 2 |
| Duct Tape | 1 |
| Masking Tape | 1 |
| Great Stuff | 1 |
| Gloss Red Spray paint | 1 |
| Flat Black Spray paint /Red | 1 |
| NewsPaper | 1 |
Tool List
| Jig saw | |
| Pliers | |
| Drill | |
| Latex Gloves |
