
I’m not going into great detail on the construction of my props. I’m a firm believer that every prop is different…people use different components, motors, actuators, solenoids, etc. This makes it almost impossible to give precise measurements. A prop constructor must use their own talents to make a prop work for their particular item. USE YOUR IMAGINATION…and apply my ideas to your creations.
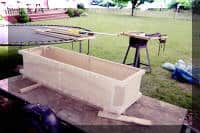
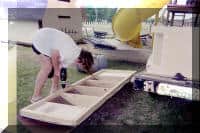
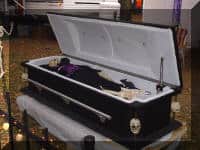
The main body of the coffin is basically…a box. The key here is to build this out of one sheet of wood. it measures 71″ long x 23″ wide x 18″ tall (roughly 6’X2′ and 1.5′ tall).
I ripped 2×4’s down to make 1 1/2″ square framing lumber. These are much lighter and still strong. I used 1/8″ Luan for the outside “skin”. This is very light.
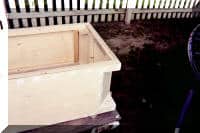
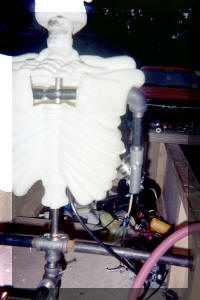
The coffin has these chamfered corners that I later installed lighted skulls impaled by stainless rods. You may also put wooden dowel rods or spindles in these corners. I just thought that it was a cool effect. This complicates construction but I felt it was worth itThe lights are my signal that the power switch in “ON”. This is one of many safety devices.

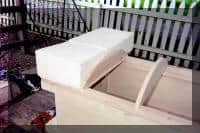
Next came the lid…Build a square frame from the 1 1/2″ framing lumber that is the same size as the top rim of the coffin body. Now, fabricate “arches” from some 3/4″ x 6″ or 2″ x 6″ lumber. The arches give the lid a unique and realistic look. To make all the arches the same, clamp them together and sand them all at the same time as shown. I cut some styrofoam and glued it to both ends of the lid also.

I carve the styrofoam with a hand saw, 3″ belt sander and a really big file that I have. I used this foam on the ends so I could angle the short ends towards the center. (open the photo to see). This also is an addition that I felt just added that “BANG” to the looks of the final product.

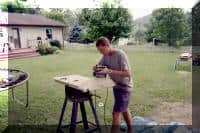
We covered the lid with a brown “peg-board” material that is the same as the boards you get to hang peg-board hooks on but it doesn’t have holes in it and is only $5. I used this board because it is flexible. Luan is too rigid to bend over the the arch. I glued the end wood pieces to the carved foam. The 3″ belt sander is great for shaping the wood (wood putty is effective also)

The lid is installed onto the base with a piano hinge. This hinge is a lot stronger than standard hinges. It helps to stabilize the lid when opening but I have to admit…..I used it since I already had it.

The lid is installed onto the base with a piano hinge. This hinge is a lot stronger than standard hinges. It helps to stabilize the lid when opening but I have to admit…..I used it since I already had it.