
I am hoping to get this prop done before the March 31st deadline. Here are some updated pictures of my progress.
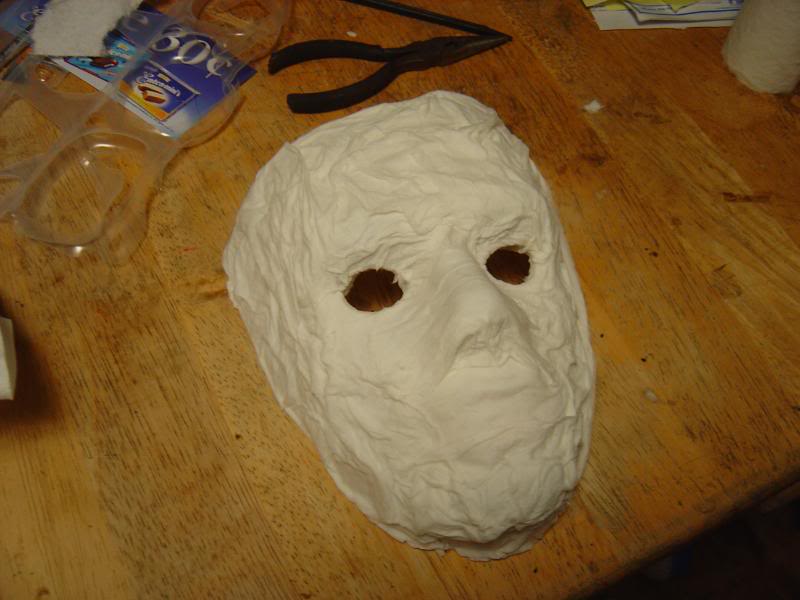
The is the start of my project. Adding a little paper mache to the mask.
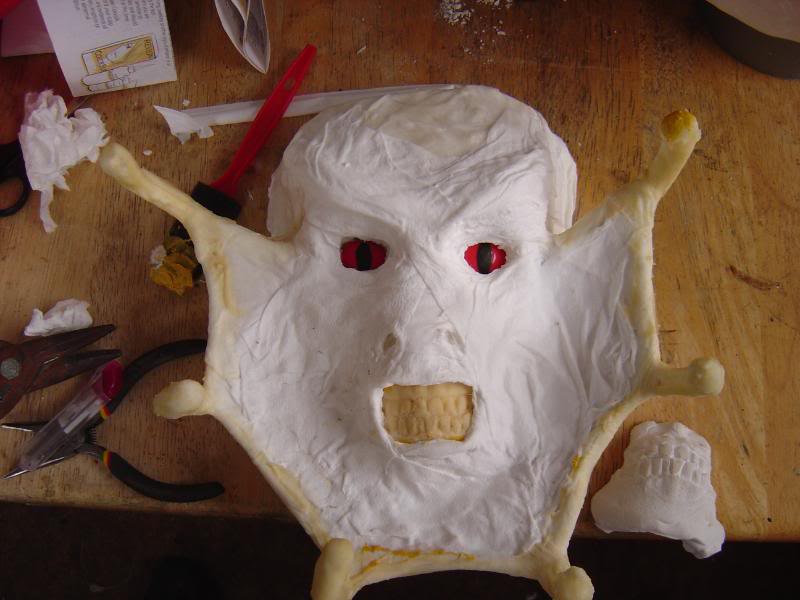
This is the mask at stage two. You can see his nice smile in this one.
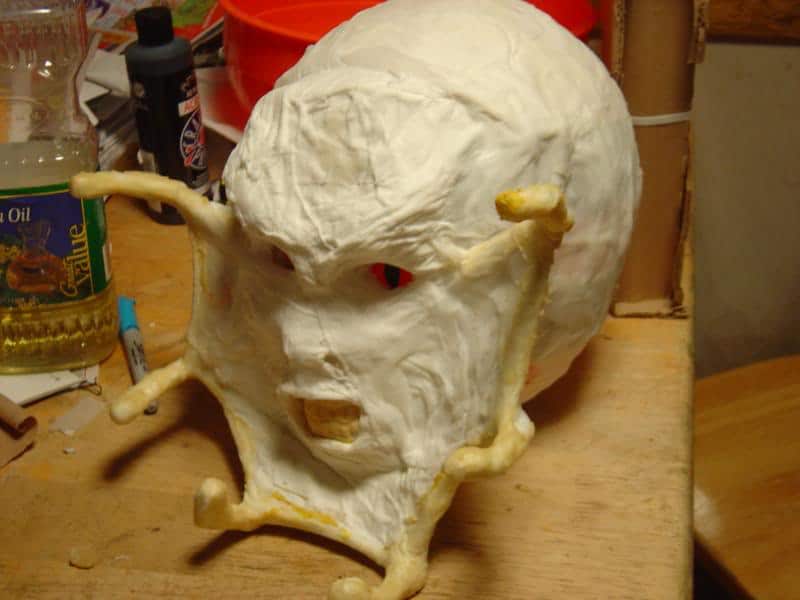
The back of the head is added to the mask.
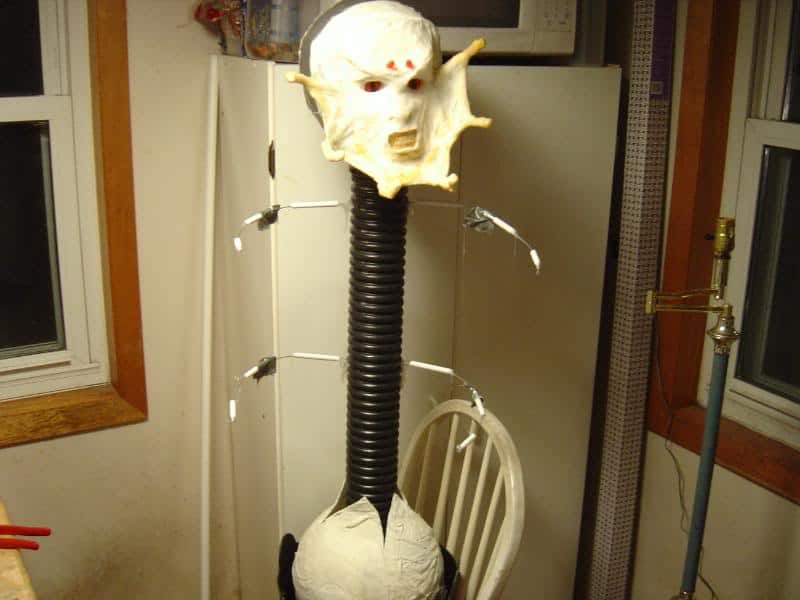
I am starting to work on the body a little.
Here is a picture of Rosie in the final stages.

Here is a final picture of Rosie in the night time.
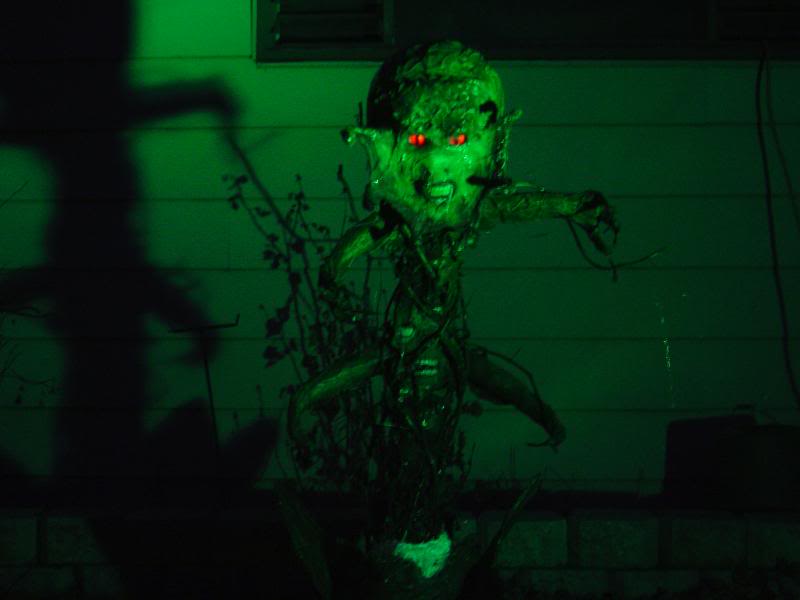
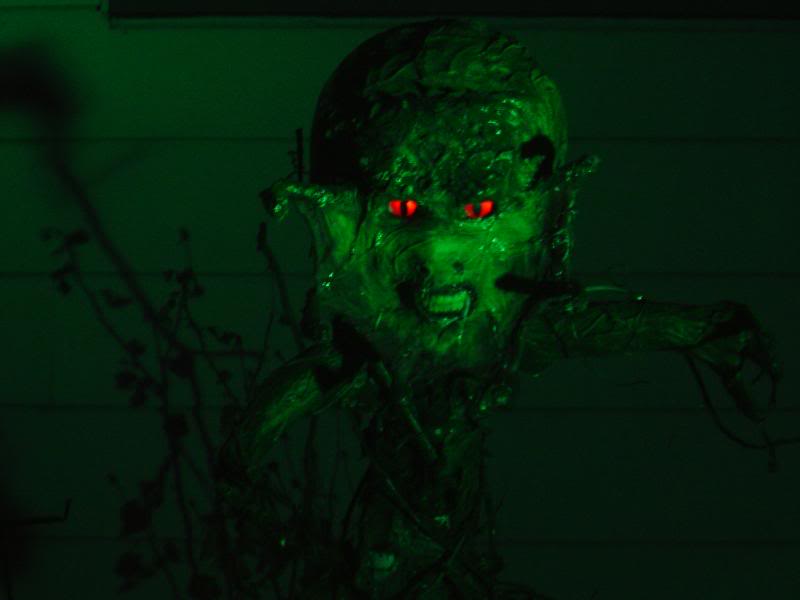
Here is a final picture of Rosie in the night time but close up.
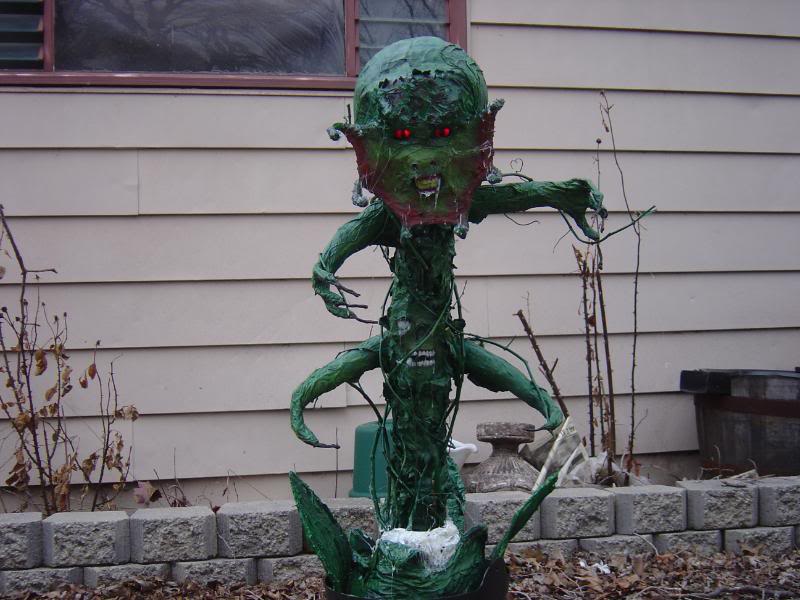
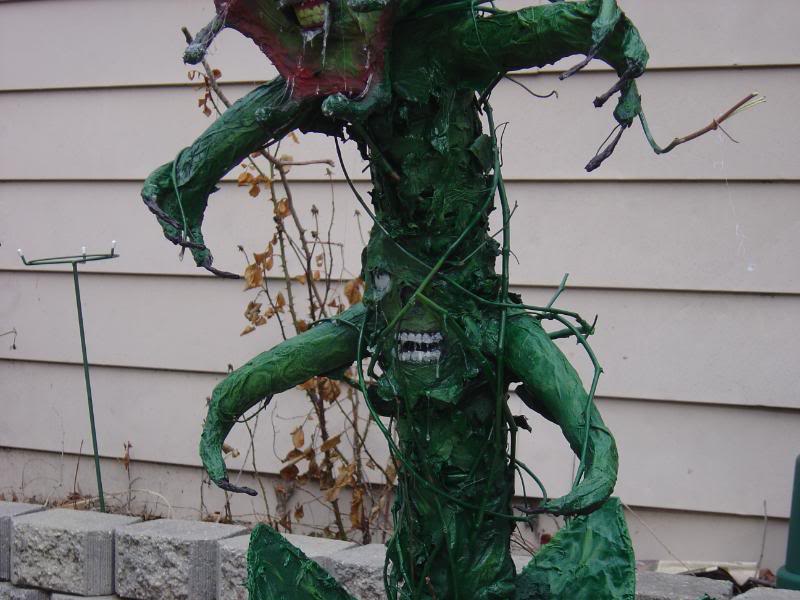
Here is a final picture of Rosie in the daylight. Her eyes are lit.
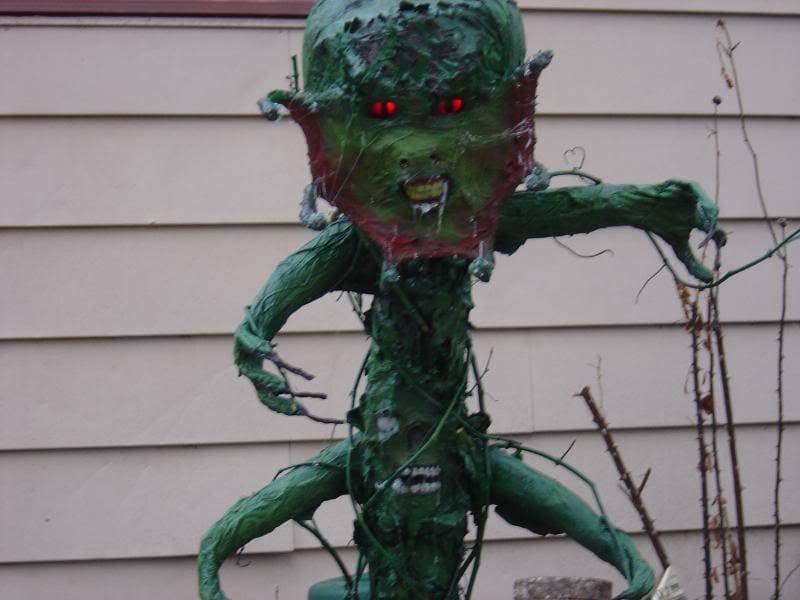
Cose up Day time
Cose up Day time of 2nd face
Unpleasant Street’s Prop Challenge
The Devil’s Rose
- The first thing that I did was I took a plastic see-thru mask that I bought from Wal-Mart and paper Mache the front of the mask.
- Next, I punched holes into the sides of the mask. Six all together. These would be for the creature’s tentacles. The tentacles were made with a combination of bic pens, wire, glue, and cotton. The six tentacles were then hot glued into each of the 6 holes.
- Duct tape was then taped around the tentacles and pulled back some to look like flaps of skin.
- For the creature’s eyes, I took a red plastic Easter egg and cut it down to size to fit each of the eyes. These too were hot glued to the inside of the mask.
- At this point the nose needed to be trimmed down. With a knife I trimmed the tip of the nose down a little, so that it would match the contours of the front of the face.
- I needed a mouth to go with the rest of the face so I had to make one. I made one by taking my skull head (The one I use for Scary Terry’s talking skull) and dip the mouth into a bowl full of plaster of Paris. The bowl was just an empty plastic butter container. After about a ½ hr the skull was pulled free from the plaster of Paris. This left me with the mold for the teeth. Before using the mold I used canola oil to grease the mold. I then used liquid latex and poured it into the mold. After the latex was ready, I pulled it from the mold and placed it on the front of the mask which I then applied some latex to the mask and the mouth as an adhesive.
- The rest of the face was then lightly paper Mache, covering the sides of the mouth and beefing up the eyes and nose. The lips were just excess paper Mache that was pulled up in spots.
- The nose was created by cutting two slits into the paper Mache and filling with a little cotton.
- The back of the head was created by blowing up a balloon and taping it to the mask. The mask and the balloon were then paper Mache together.
- With the 3oz of latex I had, I brushed the tentacles and edges of the front of the mask with latex.
- For the creature’s body I bought a 3 inch sump pump plastic pipe 10 foot and two 3 inch couplers for a dryer vent outlet hose. In the witch’s caldron, I cut a hole for the dryer vent coupler in the bottom of the caldron. With the plastic pipe that I bought, I cut the 10 foot section to 3 feet. The other coupler was hot glued to the head and placed on the 3 foot section of pipe along with the other coupler. The whole top section was then connected to the caldron.
- A pod was added to the base by blowing up another balloon. The balloon was then paper mache’d and the top portion was cut to look like an opening pod. The pod was then placed in the caldron and the sump pump pipe was placed in between the pod.
- An old 2×2 was used to keep the head steady. (1 foot) It was placed in the center of the sump pump pipe and a smaller piece of wood was used as a base. A piece of 2 inch diameter(3 feet in length) PVC pipe was then added to the top of the 2×2 and melted with a torch in two positions. This was used to make the creature lean forward.
- More of the small gauge wire was hot glued to the sides of the sump pump pipe to resemble more tentacles. Cotton was glued on the wires. To beef up the arms, the foam pipe insulation was placed on each arm. They were then melted to form the arms.
- Two LEDs were added to the eyes and the wire strung through the sump pump piping to the base. It then connects to a 9v battery through alligator clips.
- Paper Mache was then added to the sump pump piping and a little more to the face and head. After the paper Mache was added on the body, it was ripped and torn with a pottery sculpting tool along with part of the face.
- The next thing I did was to add another mouth to the low part of the body. In the same fashion as with step 6. Except two separate castings was done of the mouth to make it look as if it were opening. The mouth was then adhered to the creature’s lower body with latex. Cotton and glue was then added to the roof and bottom part of the mouth as filler.
- After creating the lower mouth, I noticed a really good place to put an eye. A ping pong ball was cut in half and placed in that spot along with a little paper Mache.
- Picture hanging wire was rapped around the front hands and bottom claws to give it an appearance of nails.
- The large leafs on the pod were made from hangers in my closet and draped with paper mache.
- The body structure was then painted with a green can of spray paint.
- I then used vines that I got from Grapegrl and added them to the creature’s body.
- My wife let me use her stock pile of paints to add to the dimension of the creature’s contours.
- Plastic wrap was added to the inside of the pod and Mod Podge was smeared on the plastic wrap.
List of materials Cost Comment
- Mask
- Cotton
- Duct Tape
- Sump pump pipe
- Foam Pipe Insulation
- Dryer outlet couplers
- Plastic caldron
- Bic pens
- Small gauge wire
- Picture hanging wire
- Plastic Easter egg
- Viva Towels
- Spray Paint(green)
- Coat hangers
- Hot glue sticks
- Ping Pong Ball
- Grape Vines
- Glue
- Latex
- (20 bucks gal.)
- 2×2 piece of wood
- PVC pipe
- Plaster of Paris
- Hod Podge
- Cooking Oil
- Balloons
- 470 ohm resistor
- LEDs
- Electrical wire
- 9v Battery
- Mini-Alligator Clips
- Plastic Wrap