This advanced project takes a lot of work and a lot of planning (and a fair amount of cash), but it is well worth the effort. It was by far the hit of Halloween 2003.
As always, lest you wind up a victim of your own magic mirror’s machinations, take safety precautions when making any halloween project.
If you’ve ever done any woodworking, this should be a snap to you, but even if you haven’t, nothing in this project is very difficult as long as you think ahead, and work safely. It was a fun project to build, it was a smash hit with the trick-or-treaters, and is a great way to get your confidence up to build major props. I highly recommend this experience.
Having access to some extra helpers, especially people who are talented painters or woodworkers, is a great help, especially when it comes to moving around large sheets of MDF and shelving units.
The Idea
Before we begin, let’s talk a bit about the idea behind what we are constructing.
The idea was to create a magic mirror prop that would interact with the kids. We wanted it to be similar to the magic mirror from the Classic Disney film ‘Snow White’, but of course, you could use whatever visage you like.
To make the mirror more interactive, we decided to place the mirror on the wall above a dried-out lion’s head fountain. A blast of smoke would spew out of the lion’s mouth into the basin, and when the smoke clears, the treats for the children would remain in the basin.
To accomplish this illusion, we decided to build a wood-and-foam facade, attached to a metal shelving unit for support. A fog machine would provide the blast of smoke, and a hidden hole in the wall would provide access for placing candy in the basin. A computer screen would furnish the face of the mirror (although in a pinch, a human face could easily be used as well).
A ‘scrim’ would be used to obscure all but the face from the trick-or-treaters. (A ‘scrim’ is a piece of semi-transparent fabric that is opaque when illuminated from the front, and transparent when illuminated from behind. We found appropriate material at Wal-Mart for less than $3 per yard.)
The best way to envision this is to see the one we built in action. The first part of the clip shows what it actually looked like under normal light conditions. The rest of the clip consists of sample interactions with trick-or-treaters shot with ‘night-vision’ due to the low light conditions. Unfortunately, the night-vision reveals the outline of the computer monitor, but this was not visible to the visitors.)
Materials
To make the Magic Mirror, you will need:
Expendables
- two quarter-inch 4′ x 8′ sheets of MDF
- three one-inch 4′ x 8′ sheets of styrofoam
- seven 8′ lengths of 2′ x 2′ (try to get them as straight as possible)
- a metal shelving unit
- plenty of machine screws, wood screws, and nails
- four hinges
- two yards of ‘scrim’ fabric
- 2 rolls of carpet tape
- 1 gallon of medium-gray latex paint
- 1 quart black latex paint
- 1 quart white latex paint
- 2 four-pound cans of Durham’s Water Putty
- disposable brushes
- fog juice
- candy
- about four days of available time
- A dryer duct hose
Tools
- Drill
- Jigsaw
- Screwdrivers
- Cheap Foam Cutter (the small cardboard tube with a wire)
- Wood burner pen
- A fog machine
- (optional) 17″ iMac or other computer screen
- (optional) karaoke machine or other speech effects device
Design
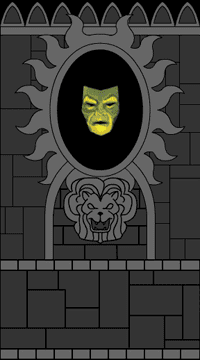
The first thing to do is sketch out on paper the design you want your facade to have. We went with a centerpiece 4′ x 8′ facade with two 2′ x 8′ “wings” on either side. Our sample centerpiece design can be seen at right, but you should of course come up with your own design, since your shelving unit may not be the same as ours.
We recommend starting your design by measuring where the shelves in your shelving unit are (unless you plan on building a custom shelving unit to your design). That way, you know where your mirror’s face will appear, where you can place supports, and where it is feasible for your puppeteer to sit and operate.
We also recommend that you spend some time in the location where you will be displaying the facade. We discovered that a facade that is six feet tall would be ideal, and that a four foot wide facade with two ‘wings’ of two feet each would give enough room for a puppeteer if it were placed in a corner and each wing folding back slightly to touch each wall.
Although doing it all on paper would be fine, we are more comfortable using a computer program to do our design work. We brought our measurements into Macromedia Flash (any vector-drawing program will do) to do the actual design work. Try to consider where everything will be placed and how it will be attached. Be sure to read below about how we placed the lion’s head and the basin. Make sure to work at a consistent scale as you design.
Transfer Your Design Onto The Materials
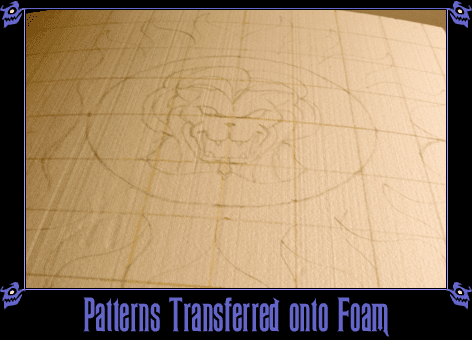
The next step is to transfer your design onto the materials. To do this, we printed out our design at a scale of one inch to one foot. We then drew a half-inch square grid on our plan using a ruler and pencil, and a half-foot square grid on the foam and MDF using a marker or chalk line. (The marker is easier, but the chalk line has is less likely to leave visible lines.)
Once you have both gridded off, you can transfer your design onto the foam and MDF by sketching in each square.

We ended up transferring the design onto two piece of MDF. The first one held the center panel, four feet wide. The second one held both of the side panels, each two feet wide.
In our design, we used multiple layers to give the facade depth. The mirror’s frame and the lion’s head were going to be raised, so we used another piece of foam for these details. (Since these were going to be cut out and attached to the base layer of foam, we could place these close together to save foam, as seen in the photo below.)
Build The Support Panels
Our design only calls for our facade to be six feet tall, so the first thing to do after transferring the design is to use the jigsaw to cut the top of the MDF pieces to the right height. Be sure to take all the proper safety precautions such as wearing safety glasses and being careful around the blades.
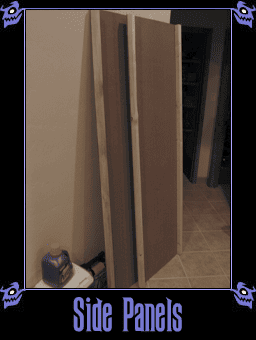
We then cut the second piece of MDF down the middle to create the two ‘wings’.
Cut the 2’x2′ strips to fit the edges of the support panels and screw them in using the wood screws. This yields the three panels that will form the support structure for our facade, with support beams and a place to screw the hinges into. In our design, we didn’t need crossbars for the center piece, since the shelving unit would provide the support, but we cut crossbars for the top and bottom of the wings (not shown in picture).
Build The Facade Exterior
The next step is to work the foam into the textured exterior of the facade. Melting foam releases dangerous fumes, so be sure to work in a well-ventilated area, and wear a safety mask.
Use the foam cutter to cut out the foam shapes you need. We found that you don’t have to be perfect in this, since we’re going for a rough-hewn stone look anyway.
Once you have the foam cut out, detail it with the wood burner. If you have enough detail in your pattern, this is largely just a matter of sketching over the pattern again with the wood burner. I liked to add a crack in the stone here and there to give it an aged look.
The lion’s head was built out of two layers of foam: one for the head and mane, and one for the snout to give it a little depth. We didn’t want the trick-or-treaters looking directly into the tube we were going to use to pipe the fog into the mouth, so we added two spacer layers of foam behind that to give the fog a path to travel from the hole in the facade, down a short corridor, and out the mouth:
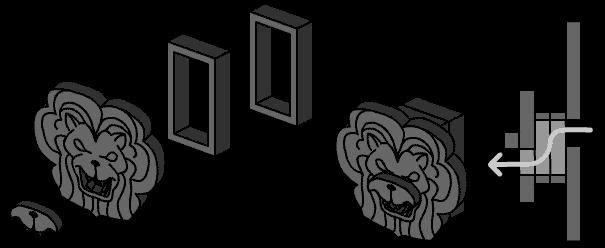
We shaped the lion’s snout using the foam cutter so it wasn’t just a block.
At this point, you can also build the basin. We used three layers of foam, one cut to be the bottom of the basin, and the other two layered on as the border of the basin. (For the bottom of the basin, we could conveniently use the oval piece of foam we cut out to leave a hole for the mirror.)

Note that for the basin’s bottom, we have a complete ellipse, not just half of one. This way, we can slide the ‘flat’ half into a slot in the facade, set it on a shelf of the shelving unit, and weigh it down to give it some real rigidity. This is because this is the one piece of the facade we expect kids to touch. We actually went so far as to cut a piece of MDF to fit the bottom of the basin so it would be very sturdy – again, we could conveniently use the oval piece of MDF left over from the hole for the mirror.
Once the basin was constructed, it was a simple matter to use the foam cutter to smooth the layered edges, and then use the wood burner to made a stonework pattern in the resultant form.
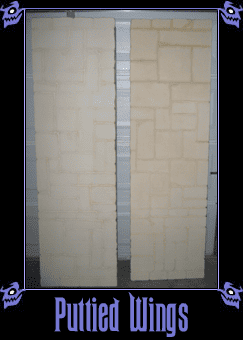
Putty The Foam
Since we want the foam to withstand being moved around and touched by trick-or-treaters, we want to strengthen it a bit. To do this, you can use Durham’s Water Putty like paint to paint on a strengthening layer to the foam.
Mix the Water Putty with water until you get a consistency about like Latex paint, then generously brush it onto the foam. Work with small batches of putty, since the putty dries very quickly.
The putty can then be used at a thicker consistency to give it a stonier texture, or to build in a little transition between layers of foam.
When it dries, the foam becomes stiffer and sturdier.

Paint The Foam
Once the putty is dry, you can paint your foam. Only use latex paint on the foam! Other paints may dissolve all your hard work!
We recommend experimenting with different painting techniques on some scrap pieces of foam before starting on your facade.
Cover all your foam with the base color. We used a mismixed batch of gray we got at the local Home Depot on the cheap, but you could use any stony color from a slate blue to a sandstone tan to a marbled green. (The Water Putty makes it a nice sandstone color naturally, but I’d still recommend giving it a base coat, just to protect it from anything that might get spilled on it.)
Once that has dried, you can start brushing in the stone detail. Start with the deep grooves. We brushed a deep black into the grooves and a watery black along the edges of the bricks, using a paper towel to pull out unwanted color when necessary. Put more black at the bottom side of bricks than the top, to suggest shadows.
Then paint a faint wash of black over some of the bricks to give them some variety. You can also use varying washes of black to visually push some bricks back in relation to the others.
Once that’s dry, you can either dry-brush some white highlights onto the foam or do a watery white wash in places for a different feel.
Paint all your foam pieces. Try to use a consistent method throughout so that all the stone matches. You may find that it helps to have the same one or two people do all the painting for this reason.
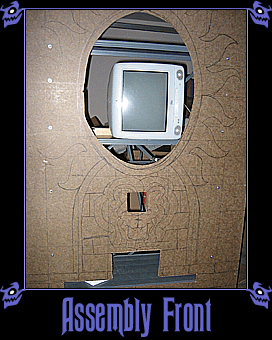
Construct The Facade
Finally, it’s time to assemble your facade! You might want to move everything to the final display location if you can, since it will be awkward to move from now on.
If you haven’t already, now is the time to cut out the holes for the mirror face, the fog conduit, and the slot for the basin.
Bolt the center piece onto the shelving unit. To do this, put the centerpiece up against the shelving unit, and use a pencil to mark on the MDF where the holes should be drilled. Drill the holes, and use the machine screws with some washers to bolt the MDF to the shelving unit.

Duct tape the scrim fabric over the mirror hole. Make sure that there are no wrinkles in the fabric, or else they will show up as lines across the mask’s face. We ended up having to iron our fabric to get the creases out – ‘wrinkle releaser’ type products did not work well enough to remove the crease.
Attach the hinges to the 2′ x 2′ support beams so that the sides can be angled back. This will allow you to put your facade flush against the wall, but still move the wall enough to allow easy access to the back room.
Use the carpet tape to attach the foam to the MDF. Use generous amounts of tape to get a secure bond. Be careful when pressing the foam facade onto the MDF – you don’t want your handprint in the stone!
Attach the lion’s head with more carpet tape. Slide the basin assembly into the slot so that the interior part lies on the ledge of the shelving unit, and weigh it down so that it is sturdy, and your facade is done!
Generate The Effect
In order for the scrim to work properly, there needs to be a lot more light in front of your facade than behind it. You want as little light behind the facade as possible. Set up your lighting situation to achieve this. You may need to drape a blanket or black plastic over the facade if you have lights shining down into the back area.
Place a fog machine nearby, and position the duct so that it will direct the fog out through the lion’s mouth. We used a fog chiller, but that’s probably not necessary.
You now have several options for actually providing the mask. The simple and cheap method is to just use a flashlight on your own face to create the effect. The only thing the visitors will see through the scrim is whatever you have lit behind the scrim. With some makeup and black clothes, you could provide a convincing mask.
Finally, for voice effects, we used a borrowed karaoke machine that would amplify our voice and add an echo effect. There are also voice changers on sale around Halloween for a few bucks that might also work for you. Simply speaking into a headset microphone and piping it through some speakers would give the needed effect.
And you’re done! Enjoy your effect!

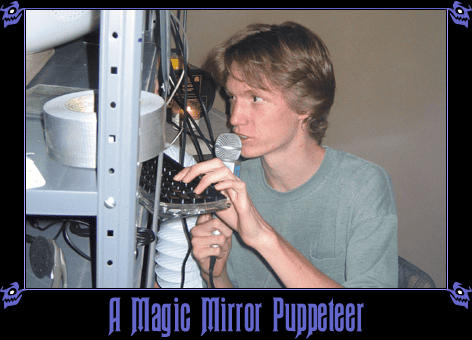
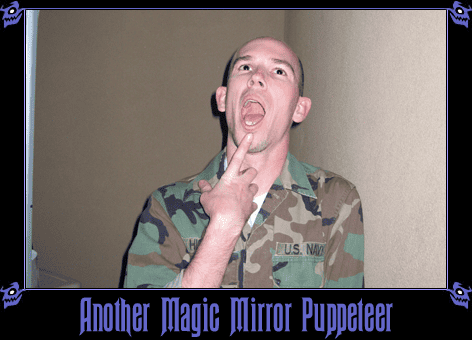
My Relief Puppeteers
One downside to this effect is that you don’t get to mingle with your guests during Halloween. I highly recommend getting some volunteers who will act as your relief puppeteers. (This effect is so cool, you should have no problem finding interested people!)
Here are photos of my two relief puppeteers, Nick and Joe, who freed me up to enjoy the reactions from the crowd. They both had a great sense of drama and humor that really made the digital puppet come alive.