Crows. Those big, glossy black birds of the genus Corvus, and especially C. brachyrhynchos of North America are real trouble. They’re known to be thieves, and if your graveyard corpses complain about the constant pecking, then you need a real scarecrow to keep them in line.
Now, I’m not suggesting some happy little scarecrow with red cheeks and a fruity grin. What you need is a scarecrow that, when asked, “how about a little fire?” would shove that burning broom right down the wicked witch’s throat and laugh. I mean, crows are some mean, evil creatures. Just one was enough to take out that poor old lady in “Omen II”, for crying out loud. A flock of them aren’t called a “murder” for nothing.
| Materials List | |
| Grape vines | Go out to the woods (preferably in the Spring before the larger hunter-seeker variety of mosquito has risen from its winter hibernation) and cut down several different lengths. More on this in a minute. |
| Large plastic cauldron | Walmart, Target, Big Lots, just about anywhere, really. |
| Newspaper, paper towels, duct tape, some scratchy rope, an 8′ 1×2 (or some sturdy post), and latex carpet adhesive | Probably piled in your garage already, blocking the lawn mower. The carpet adhesive can be found at any home improvement store, or Walmart. |
| An old lamp, and lots of black or gray cloth | Try Good Will or the Salvation Army. |
Inspiration – Rot
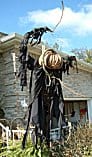
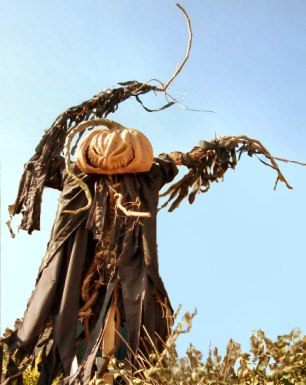
Every project derives from some inspiration, don’t you agree? In the case of our scarecrow here, suitably named “Bruno” by the lovely Mrs. SpookyBlue, we humbly bow toward Pennsylvania, home of “Pumpkin Rot”.
John is truly a unique and talented builder of Halloween props. I discovered his website a couple of years ago and was hooked. His original classic scarecrow is the base line measurement for our own raven muncher. John’s concept is (in my mind, anyway) the best example of that sinister and truly frightening presence that we dread to discover while all alone in the middle of a cornfield somewhere. It was that presence that we hoped to duplicate using our own choice of materials and construction methods.
We at SpookyBlue often lift ideas from other haunters, but you’ll never catch us taking the credit for someone else’s original concept. “Pumpkin Rot” is the quintessential scarecrow, though “Johnny Appleseed” is truly terror on a stick. You’ll understand what I mean when you see them for yourself. And don’t even get me started on “Roots”, a most vile creation that has inspired me to even greater and more horrifying challenges for the future.
The inspiration to create is such a cool gift.
Building the body
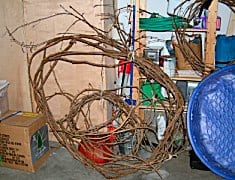
We are lucky enough to have access to (and permission from the owners of) a patch of woods that is literally crawling with grape vines. Using loppers and not a little effort, we scored about a hundred yards of vine.
If you decide to give grape vine a shot as the body of your scarecrow, pick yours in the spring when it’s green and pliable. Choose different lengths and thicknesses. When green, thinner vine can be wrapped and corded, and it is extremely strong.
Grape vine will quickly dry out in storage, so we decided to build the body of our scarecrow before the vines became brittle. Trust me. If you wait, you’ll be disappointed when they break into pieces. Or course, you could soak your vines for a few days, but ours were already soaked.
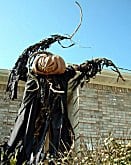
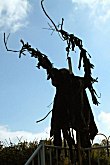
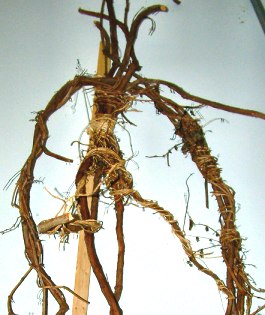
So we cut our vines into manageable lengths and wound them together to form the main body mass. We wrapped this tightly with scratchy rope (I really don’t know what this stuff is called, but it’s scratchy and it’s rope) and secured it to our 8′ post. We did the same for his arms, making one long “rope” that would become his 20′ wingspan.
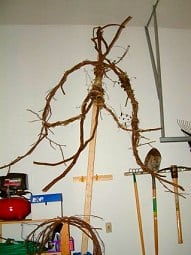
From an engineering standpoint, it seemed like a good idea to lash a single long “rope” of woven grapevines to our center post to serve as Bruno’s arms. As it turns out, this worked pretty well. Hanging in the garage over the summer, the arm length took on a distinct bow, which, when turned over to point upwards, gave our scarecrow a very unusual look. His gesture is very ogranic as if he’s pointing toward something.
Using wood screws, we attached a second 1×2 about 4′ long to serve as his shoulders. To this we lashed the arms, rolling the m to point upward. Having grown up on a farm, I have pulled my share of old fence posts out of the ground using a chain and a bumper jack, so I knew how to tie a half-hitch knot. I wrapped the rope around post and vine once, tied a half-hitch on the end and pulled it tight, making sure to leave a couple of feet of rope free on the other end of the knot. I wrapped the rope tightly around the mass several times and tied it off to the length left over from the half-hitch end. The scratchy rope holds tightly to whatever it’s wrapped around, so I only had to use a couple of lengths to secure the arm assembly to the shoulder post.
We had to saw off some protruding vines in order to attach the head, but for the most part we left all the various sticks and things poking out all over.
Project Update: Bruno’s head was not, in the strictest sense, attached to anything. In deference to our old friend, and so as not to draw comparisons that might paint him (the scarecrow) in a bad light, I’ll skip the obvious and obligatory political commentary.
Bruno’s body, a tangle of grape vines and debris, was lashed to an 8′ 1×4 post. To that we fastened a 4′ 1×2 cross-piece, about 24″ from the top of the post. This put his shoulders well below the top of the vertical post. I had originally planned to set Bruno’s head atop the collection of sticks that jutted up from the shoulder area, but I had trouble with the angle. He tended to want to gaze up at the sky instead of glare down at his guests, so I trimmed a few inches off the longer vines. This allowed the head to partially rest on the shoulders, but there was still too much play.
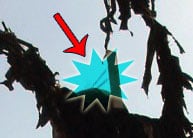
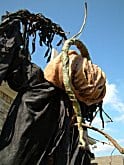
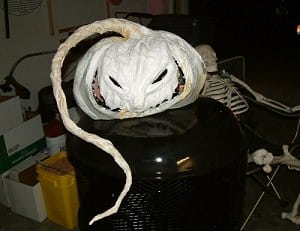
If you look closely at this photo (very closely), you’ll see a thin guy wire running from the back of Bruno’s head to the top of the post. Varying the length of the wire allowed me to adjust the pitch. Shorter wire pulled his chin (if he had a chin, but you get the idea) up.
A small hole was drilled through the back of his head for the wire, and a metal washer was permanently glued over the hole. I slipped the wire through the hole and tied it to a small dowel rod inside. The dowel kept the wire from pulling back out, and the washer prevented the wire from cutting a wider hole in the event of some unforeseen lateral movement. This was probably overkill since the plastic cauldron I used for the armature was left intact, and any sheering forces strong enough to cut through the plastic would surely have snapped the wire first.
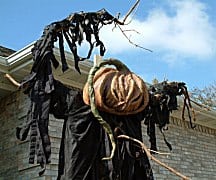
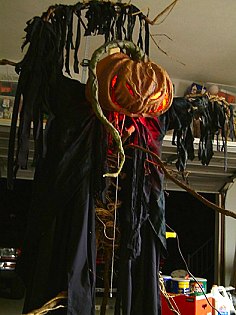
After the arms were secured, we dressed Bruno in an old choir robe we scored at Goodwill, and that was no mean feat. Try putting a shirt on a writhing monster made out of grape vines sticking every which way and not learn a thing or two about patience. Before dressing him, we aged the cloth by rubbing it with sand paper. Rubbing it vigorously, I might add. We also cut long strips of black cloth and tied them to the arms. Up to this point I had my doubts as to whether this monstrosity was going to look like a real monster or a big pile of sticks wearing an old choir robe. The strips of black cloth made a huge difference, and they look very spooky fluttering in the breeze.
Bruno’s head

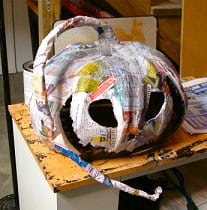
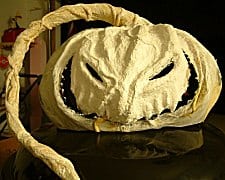
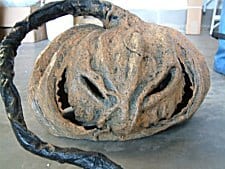
Bruno’s head started off as a plastic cauldron and evolved into a somewhat bland paper mache jackolantern that sat atop the stairs of dread last year.
I almost pitched this uninspiring JOL, but I’m glad I didn’t because this far-from-scary pumpkin continued to evolve into something really horrible. And all it took was a little more newspaper, duct tape, and some carpet latex.
It didn’t take a tremendous amount of reworking to turn our happy, friendly JOL into the menacing monster of our fondest nightmares. By the way, click the pix to zoom in.
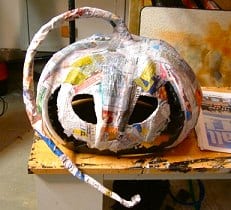
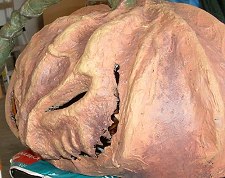
How to turn a plastic cauldron into a nightmare
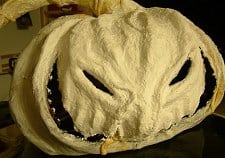
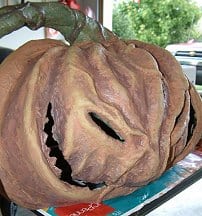
First we’ll start with the obvious. Cut your mouth and eyes using your choice of Dremel tool or a sharp knife. As you can see from the above pictures, doe-eyed jackolantern simply isn’t a good look for a sinister scarecrow.
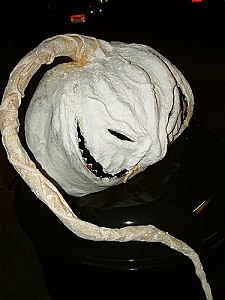
We narrowed the eyes with layers of newspaper and duct tape. We also added more thickness to the stalk by wrapping it in chicken wire, and then wrapping that with duct tape. The chicken wire added support to the shape of the stalk so that it wouldn’t collapse under its own weight. The new beefier stalk was in danger of ripping itself out of the top of the head, so we drilled four holes into the plastic and looped stout wire through them. We threaded the wire through the chicken wire and wrapped the ends inside the head. This afforded much better support and a nice handle for carrying the head around.
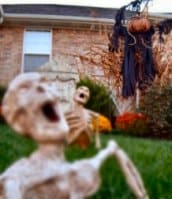
One of our skeletons (uncle Albert) watched the entire process, but really had nothing of value to add to the project.
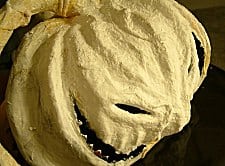
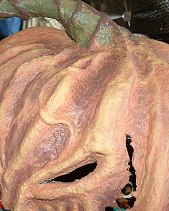
The next step was the most fun; building up the eye ridges and other “pumpkiny” features using newspaper and carpet latex. We started off by rolling up newspaper and taping it in the appropriate places, then we smeared adhesive onto newspaper strips and applied them in layers. Carpet latex dries faster than your typical paper mache glue, so the entire head was finished and ready for paint in about a day.
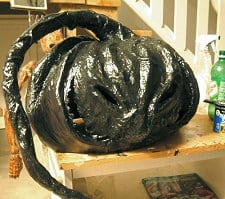
We added lots of “veins”, or I guess you could call them vines. Anyway, they looked gross, so we really liked them.
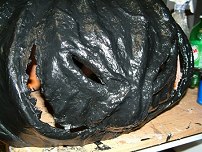
The veins are paper towel rolled into long cords with a good amount of adhesive. Just lay them wherever they look nice and yucky. We then added a finishing layer of paper towel and adhesive using standard corpsing procedures.
The final layer gave a nice texture to the skin. The teeth we pretty much just left alone. Probably a good thing, too. Scarecrows have a hair trigger … sort of like a Venus fly trap.
Paint
If you haven’t already made friends with the manager at your local Porter Paint or Sherwin Williams store, you really should. At any given time these folks can be found up to their armpits in mismatched paint that they’ll be more than happy to unload on you (sucker) for cheap.
If you’re nice, they might even add some tint to that “brisk autumn dusk ” (beige) that some lady brought back to exchange for “peach petal number 7” (beige) so you end up with a nice brown. In any case, $2.00/gallon for premium outdoor latex paint is a good deal. I’ve told my wife that a hundred times, anyway. We have enough paint now to coat the entire SpookyBlue household in “brisk autumn dark”.
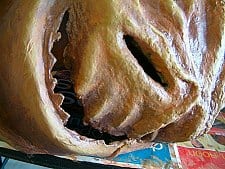
We put down a base coat of flat black latex to start things off, then went with a pallette of browns, orange, and tan (peach petal number 7) for the detail work.

I like to start with dark colors and work up to the lighter colors depending on the topography of the area I’m painting. As it turns out, I really didn’t need to put the base coat of black on there since none of it ended up showing through to the end, but I figure another coat of paint just adds a little more protection to the corpsed paper towel underneath.
The highest areas like the tops of the eye ridges, and that toothy area above the mouth area highlighted with the lighter colored paint. I used paper towels, brushes, and a sponge to dab the paint instead of trying to brush it on in one coat. If you’re well versed in airbrushing, you’ll find this to be a rewarding experience. If you’re like me and don’t like spraying yourself in the face every few minutes, brush on a little paint, then spread it around with a sponge or paper towel. Just work in layers until the overall effect is what you were looking for.
If you don’t like the direction your paint job is headed, don’t sweat it. Just go back with a neutral color and start over. I find it’s less distracting to start off with a blank canvas instead of trying to fix a botched job. But there’s really no such thing when it comes to paint. Wipe it off or wait for it to dry, and try try again.
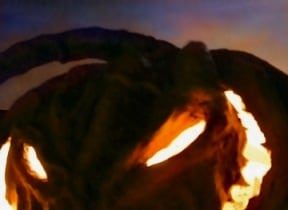
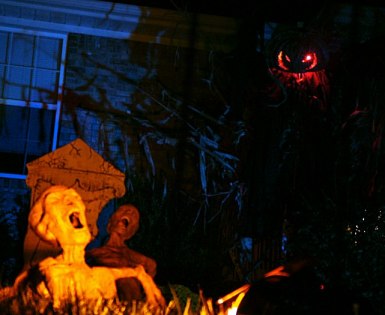
Hellfire Lights
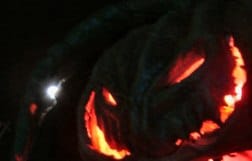
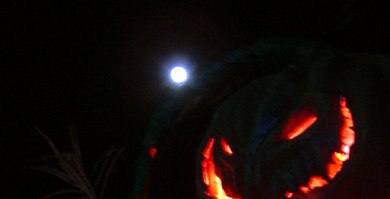
A sinister scarecrow like Bruno must have a smoldering grimace … like the Grinch. After eating a whole bunch of Whos. That were on fire.
Short of setting some Whos on fire and stuffing them in your scarecrow’s mouth (that would get old after a while), I can think of two ways to make your scarecrow’s JOL face glow like the pit, and I used both of them.
Colored lights and theatrical gel.
This is where the old lamp that you got from Goodwill comes in. I splurged and bought a dual-socket kit from a home improvement store that’s getting creamed now that the new Lowes finally opened. I fashioned a homemade L bracket out of some scrap aluminum, bolted one end to a scrap of wood, drilled a hole through the back of Bruno’s head (he had too many evil spirits in there anyway…let a few out), and bolted it down. To this contraption I affixed the lamp assembly, keeping it centered and away from anything that could conceivably melt, warp, catch fire, or explode. It even has a long pull-cord on/off switch which I hid down the back. Sort of a secret weapon in case he goes berserk and ignores my commands to stop eating spicy Whos.
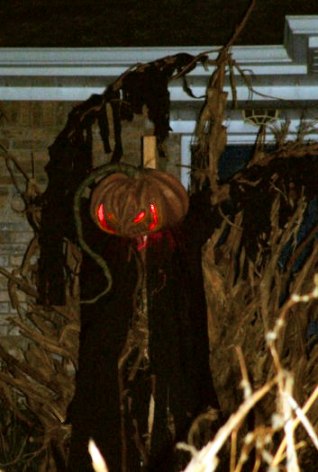
I originally used normal bulbs and placed theatrical gel over the eyes and mouth, but the wash of light coming out of the bottom of his head was too bright, so I switched to red bulbs. The blood red light spilling out over his torso lends an eerie effect, though I suppose some black cloth stuffed up around his collar would quash that. I almost went that route until Bruno began to look like he was wearing a scarf. Our graveyard won’t tolerate such Incongruous-ness-ity, so we dropped the scarf.
If you’re wondering what the heck theatrical gel is, they’re colored sheets of plastic. They’re designed to withstand a fair amount of heat, you can trim them to fit in a frame (cheap canned lights … how-to coming soon), and if you have a friend in a band you might be able to score some for free. (Thanks, Daiv!) I don’t recommend you use colored plastic wraps because they will melt fairly easily. I also don’t recommend that you use more than 40W bulbs in your sockets to cut down on possible heat issues. Better yet, you could build a huge SpookyFire Blob and hang it in there. No AC hookups to run. (I know, I know…but it takes time, of which I didn’t have as much this year)
Finish Out
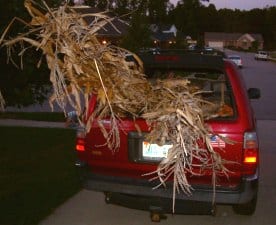
We paid some guy with a smarmy grin $5.00 each for our corn shocks. That’s just wrong. I’m going to have to make friends with a corn farmer’s family somewhere. How do you do that, anyway?
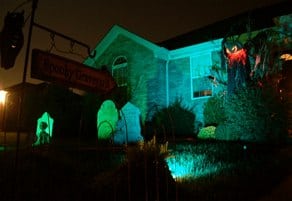
Anyway, corn is a scarecrow’s natural element. Especially when it’s dry and rustly and smells like dust. That just practically screams Halloween. We used both shocks, and it made the overall effect very impressive.
We roped Bruno’s main support beam to the front steps hand rail. If this kind of arrangement isn’t available to you, then you’ll probably need to dig a hole 2-3′ deep or deeper depending on the weight of your monster. Nothing is more undignified to a scarecrow than to do a face plant into the turf, so make sure yours doesn’t blow over in the wind.
Well, I can’t think of anything else really important except to say thank you for coming, now get the hell off my lawn.
Oh, and this how-to, like most of the projects you’ll see here at SpookyBlue, is more of a collection of suggestions than hard and fast rules. For example, if you don’t have any grape vine handy, or if you think that’s the dumbest idea you’ve ever heard of, try tying corn stalks to scraps of wood. That would be a lot lighter than this beast, which would make it easier to mount. But what you do with your props in the privacy of your own haunt is none of my business.
Have fun, and let me know how your scarecrow project goes!